How to assemble Zig-Zag chair
ジグザグチェアの組み立て方

This is the 007 Zig-Zag chair set after completion. Here’s how to build it…
ジグザグチェアとその背景が組み上がったところです。組み立て方を説明します。

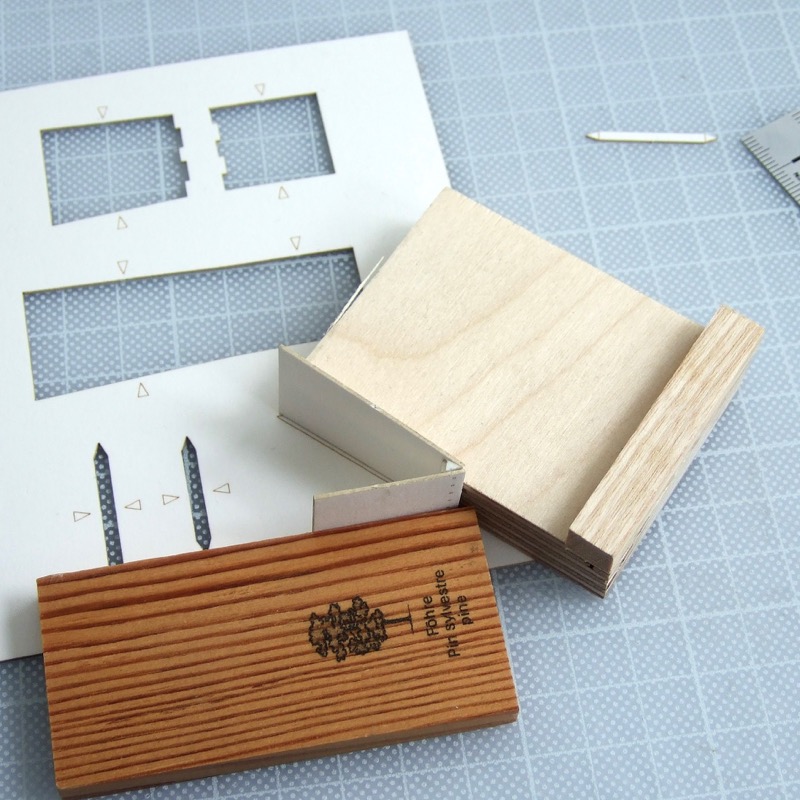
There are three cards in the package, together with assembly instructions. Detach all parts of the chair from the second card, using a craft knife/scalpel – connections are indicated by little triangles.
この3枚のカードと組み立て説明書が1セットです。まず、レーザー加工されている厚紙から、小さな三角形で示している「つなぎ箇所」をカッターなどで切り落とし、パーツを外します。

Put seat and back together with the joint, apply glue to joint surfaces and let it dry on the side profile, to make angle correct.
座と背の部品を継ぎ手で組んで接着し、輪郭にのせて乾かし角度を固定します。

Mountain fold the base part at laser line, attach shorter structural support in the corner with both triangle ends folded. Best to use scrap wood to set the part at correct angle, leaving it until the glue is dry.
脚部のパーツを山折にし、端を折った短いほうの構造材を裏から貼り付けます。輪郭線に乗せ、積み木などの直角があるもので2方向から固定して、接着剤が乾くまで待ちましょう。
Mountain fold both triangle ends of longer structural part and glue it under the front end of the seat.
残った構造材の端の三角形を山折にして、座の下に角を合わせて接着します。

Cut top part of card after parts are taken out and place on the side profile as shown below – this will be the width adjuster for the next stage.
パーツを外した残りの厚紙の一部を切りとり、写真のように輪郭線に重ねます。次の手順の接着でこれが幅の違いを調整します。


Glue seat and base at front corner, using profile on card as a guide of correct angle and leave it until dry.
座と土台とを座の全面で接着します。輪郭線にあわせて乾くまで固定しましょう。

A bit of detail of groove on the back if you want – use a sharp knife and carefully peel a few layers of card away, inside the rectangular laser engraving.
もしもディテールを付け足すなら、、、背の背後のレーザーでハーフカットされた長方形内の、厚紙のレイヤーをカッターの先などではがすと、溝ができます。


The last step is to assemble the wall and floor. Please refer How to assemble background, to complete.
壁と床を組み立て、完成です。詳細は背景の組み立て方を参考にしてください。
