How to assemble Mezzadro stool
メッツァドロスツールの組み立て方

This is the 006 Mezzadro stool set after completion. Here’s how to build it…
メッツァドロスツールとその背景が組み上がったところです。組み立て方を順を追って説明します。

There are three cards in the package, together with assembly instructions. Detach all parts of the chair from the second card, using a craft knife/scalpel – connections are indicated by little triangles.
この3枚のカードと組み立て説明書が1セットです。まず、レーザー加工されている厚紙から、小さな三角形で示している「つなぎ箇所」をカッターなどで切り落とし、パーツを外します。

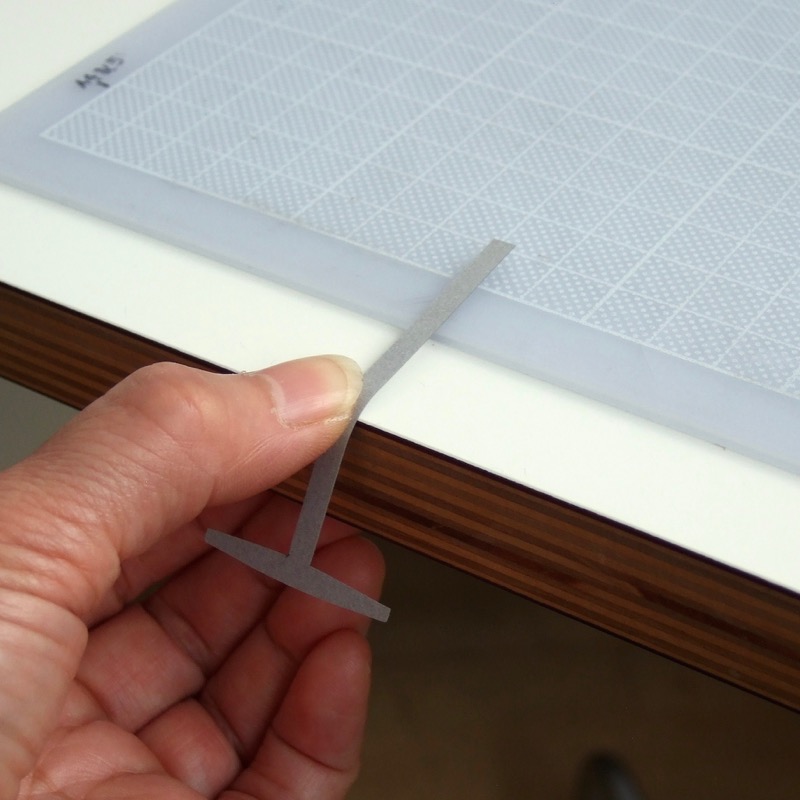
Form curves of leg parts in areas defined by lines. It is best to use a sharp solid corner, press and roll each piece with the ball of your thumb, then smooth the curve with a thin round stick…
支柱部分の成形は、まず上の写真に図示したエリアに丸みをつけます。一枚ずつ、親指の腹で机の角などに押しあて、前後に転がすようにして丸みを付け、細い丸棒で形を整えます。


Apply glue in between, attach together and place the part in the profile slot in the card until it dries and the shape is fixed.
2枚を接着し、カードにある支柱の切りぬきに差し込んで、乾くまでそのまま置いて形を固定させます。

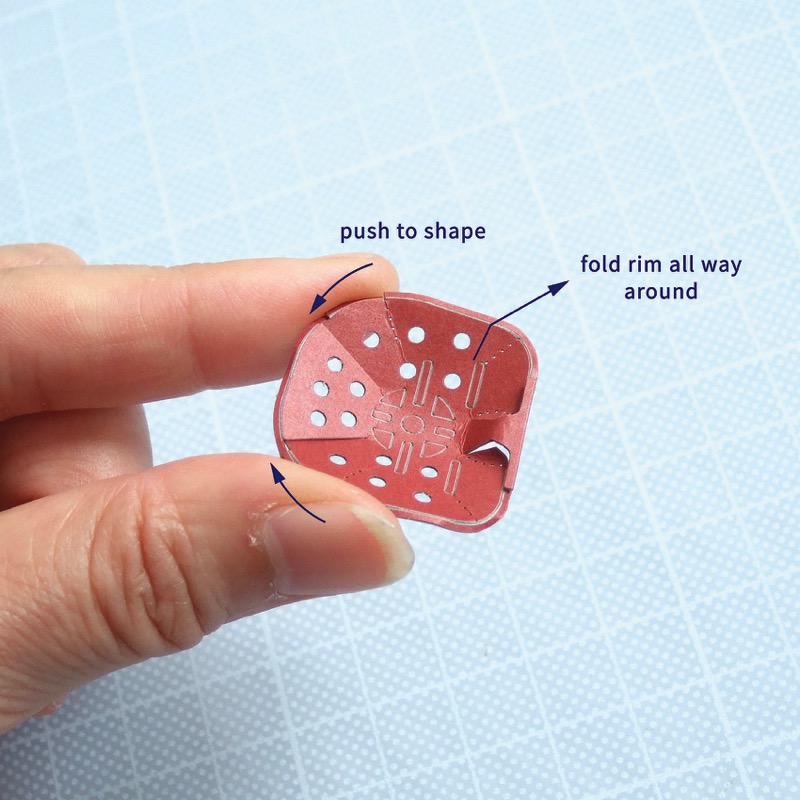
Carefully shape the seat into ‘pressed tractor seat’ contours – firstly gently form ‘valley folding’ for radiating dotted lines. Then fold up and down the front centre of the seat, until the tongues are meeting the rim.
放射状の点線をおだやかな谷折りにして、座の形を少しずつ「トラクターの座」に成形します。前中央の切り込みは一度折り上げ、さらに折り戻してのりしろが縁に重なるよう形づくります。

It is best to use tweezers to make two valley folds at the front of seat, as they are small and the folding lines are curved.
座の前面にある2本の谷折り線は、カーブに沿って固定したピンセットに押しつけるように折ると綺麗に仕上がります。

When the seat is getting three dimensional, fold the rim down all the way around and shape the seat. Place the gluing tongues under the rim, hold to make X shape at the overlapped area…
座の形が少し立体的になったら、端ぐるりを折り下げてさらに形を整えます。端に飛び出したのりしろを下に重ねて寄せると、座の後ろに交差した「X」の形状ができます。

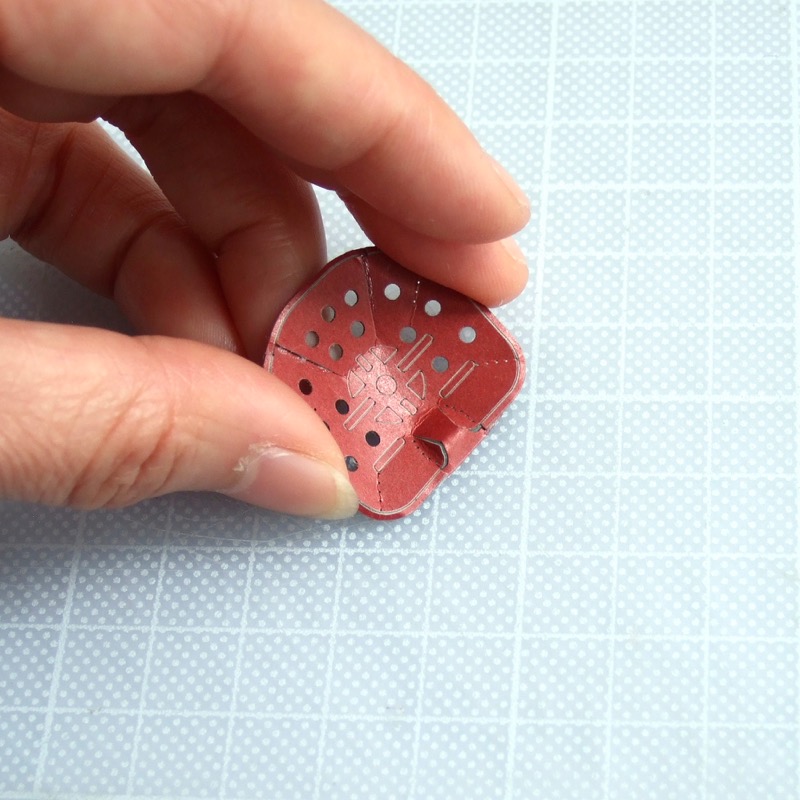
Glue the back of the seat first. Apply glue where overlapped, both to rim and the seat, then hold the gluing area against a hard surface and wait for the glue to set.
まず座の後ろを糊付けします。座の部分と折り曲げた端の両方の、重なったのりしろに接着剤をつけ、形を保つように机などに押し付けて乾くのを待ちます。


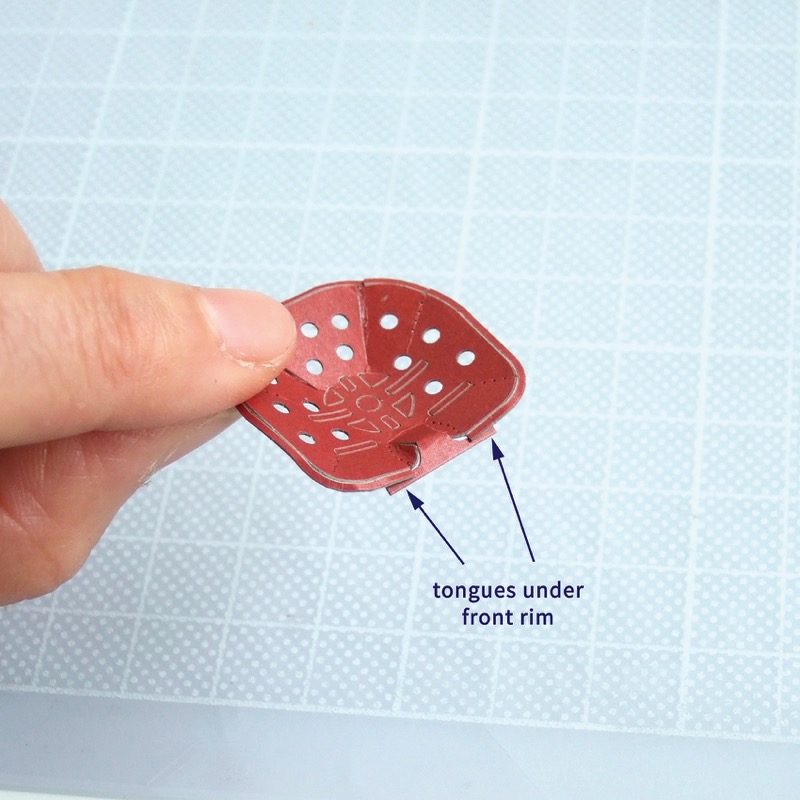
The front is similar – place tongues under the front rim, apply glue to the overlapped areas and hold it in shape until dried.
前側も同じように、飛び出たのりしろを端の下に差し込み、重なりを接着して乾くまで机などに押し付けて待ちます。
When leg part is dry, attach wooden coloured layers on the bottom and the top.
脚の部分が乾いたらテンプレートから外し、木のレイヤーを裏と表に足します。


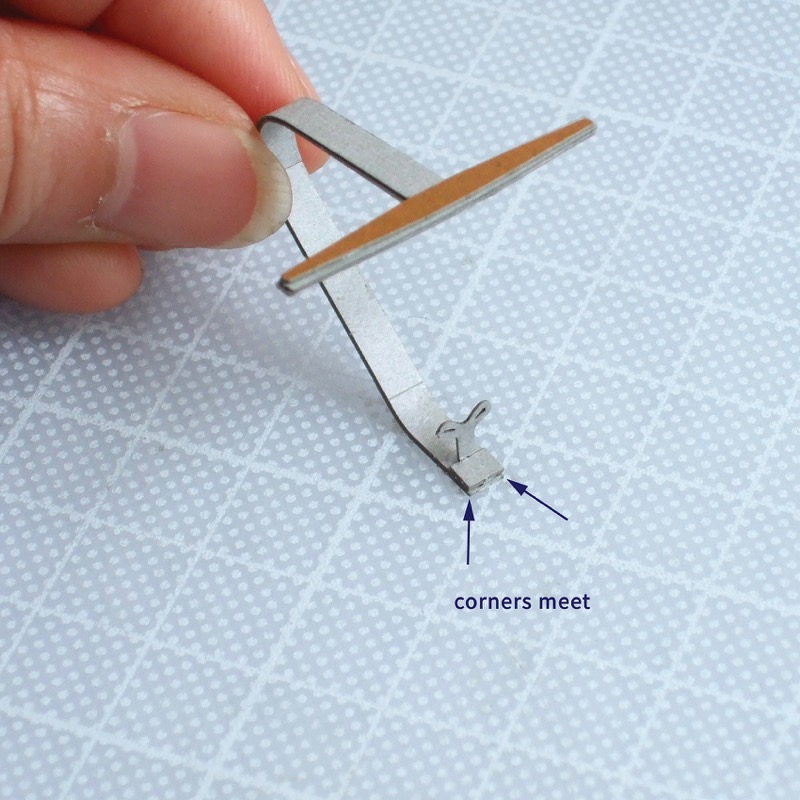
Fold wing nut part at the hole and place it under top end of the leg part. Locate corners of rectangle to meet the ends of the top…
蝶ナットの部品を穴の位置で折り曲げ、長方形のコーナーを脚部のトップの端に合わせるようにして、下向きに貼り付けます。
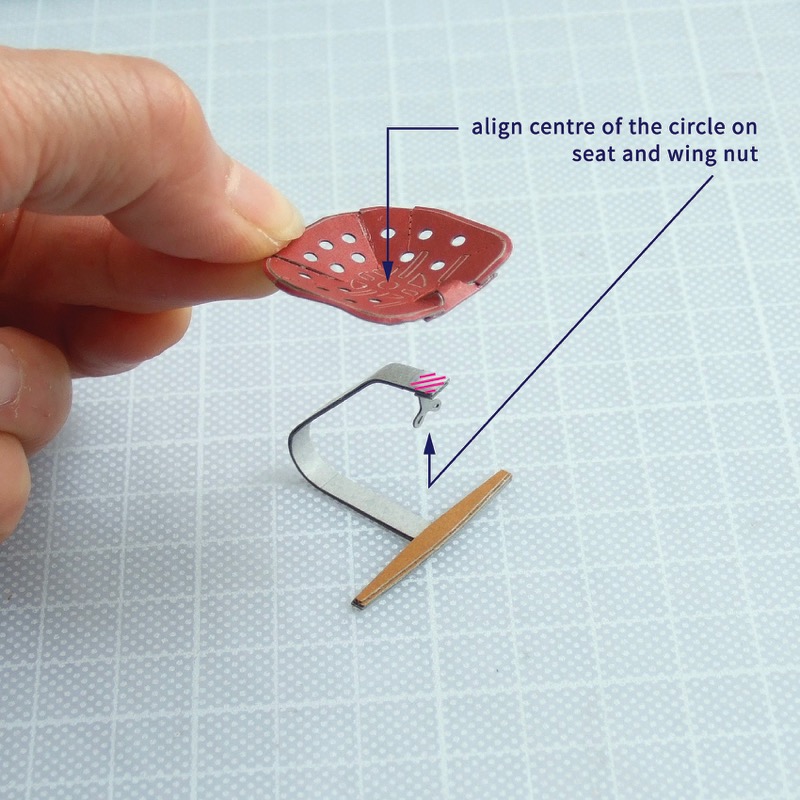
Apply glue to small area at the top of the leg. Place the seat – align centre of small circle on seat with the wing nut. Check top view for the mirror balance of the seat and the leg and correct it if necessary before it dries.
脚部の先、斜線の部分に接着剤をつけ、座を上に乗せて貼り付けます。この時、座の中心にある円と蝶ナットが直線につながるような位置に重ね、接着剤が乾く前に左右を均等に調整します。


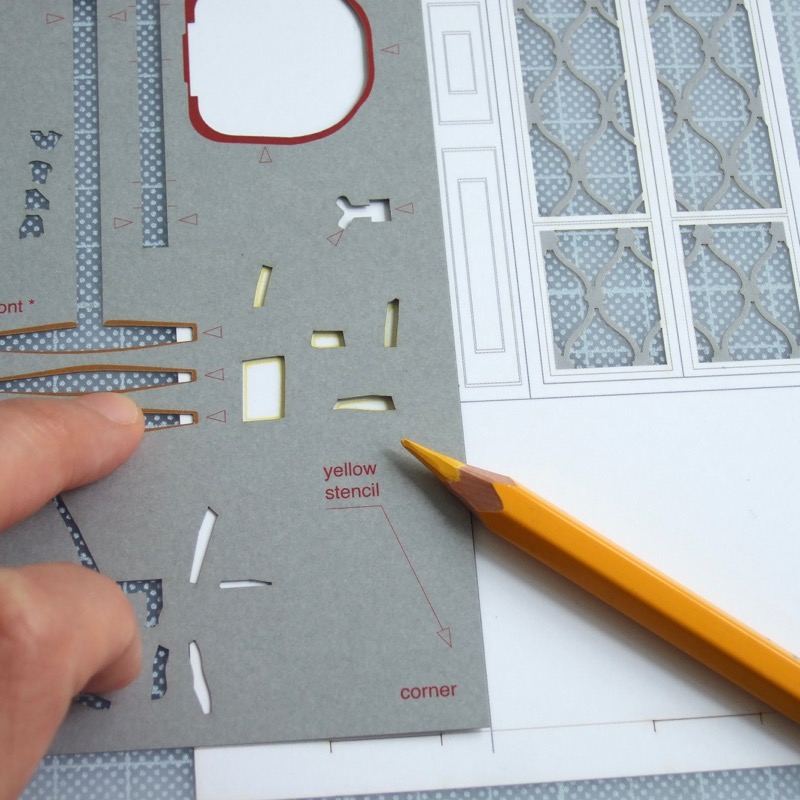
Now the stool is complete! Next step is the wall stencil decoration as in the Castiglioni brothers’ 1957 installation. Use the stencil template on the leftover card and sharp coloured pencils – originally Yellow, Green and Red.
座が固定されたらスツールの完成です。次は1957年の展示会を再現する壁のステンシル模様を足しましょう。スツール部品を切り離したカードに空いた穴(テンプレート)と、先の尖った色鉛筆3色を使います。

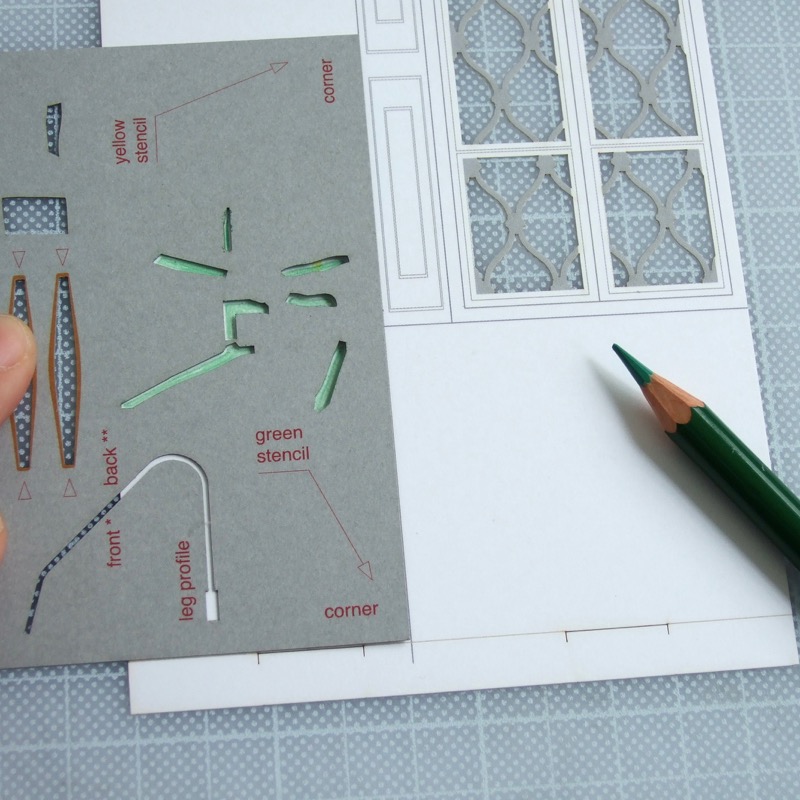
Place corner of template to the point where blue arrow shows, then stencil patterns and fill with colour as in the following images, repeat with all 3 colours and recreate the atmosphere of the original installation.
テンプレートを矢印の箇所にあわせて置き、下の写真のように色鉛筆で形をなぞって中を塗ります。3色を完成させると、カスティリオーニ兄弟の展示の雰囲気を再現することができます。


For assembling wall and floor together, please refer to How to assemble background link. When you place the stool in the room, your diorama is completed.
壁と床の組み立ては、「背景の組み立て方」を参照してください。スツールを置いて、ジオラマの完成です。
