How to assemble Well Tempered chair
ウェルテンパードチェアの組み立て方

This is the 010 Well Tempered chair set after completion. Here’s how to build it…
写真上)ウェルテンパードチェアとその背景が組み上がったところです。順を追って組み立て方を説明します。


First of all, you need a scourer pad to rub the surface before starting – this is an option if you want the finish to be closer to the original chair. The product shown below, or something similar, does the job – please test at the edge of the chair card before rubbing the parts. Also super-glue and a toothpick help you to complete this model. In addition, it will be a lot easier if you have a set of bulldog clips to use as clamps.
写真上2枚)まず、この紙模型に必要なものです。光沢のある紙をヘアライン加工にするためには、鍋洗い用の荒い目の「磨きパッド」が最適です。用紙の端で試して、深すぎない均一なヘアラインになるものを探してください。そして、この模型には瞬間接着剤が一番よい接着素材です。つまようじとクリップ2個があると、接着がキレイに仕上がります。


A little technique to make the complete model clean and neat – How to apply super-glue. As shown below, drop a tiny amount in the centre of gluing area, then spread it to the area of indications (bolt and nuts for the real chair). Make sure to read the user instructions and warnings for super glue first.
写真上2枚)瞬間接着剤の扱いで、この模型がキレイに仕上がるかどうかが決まります。多くつけすぎると流れて指やクリップにくっつき、表面のシルバー箔がはがれたりします。小さな一滴を接着エリアの中心に落とし、つまようじの先で伸ばしてから接着するとうまくいきます。


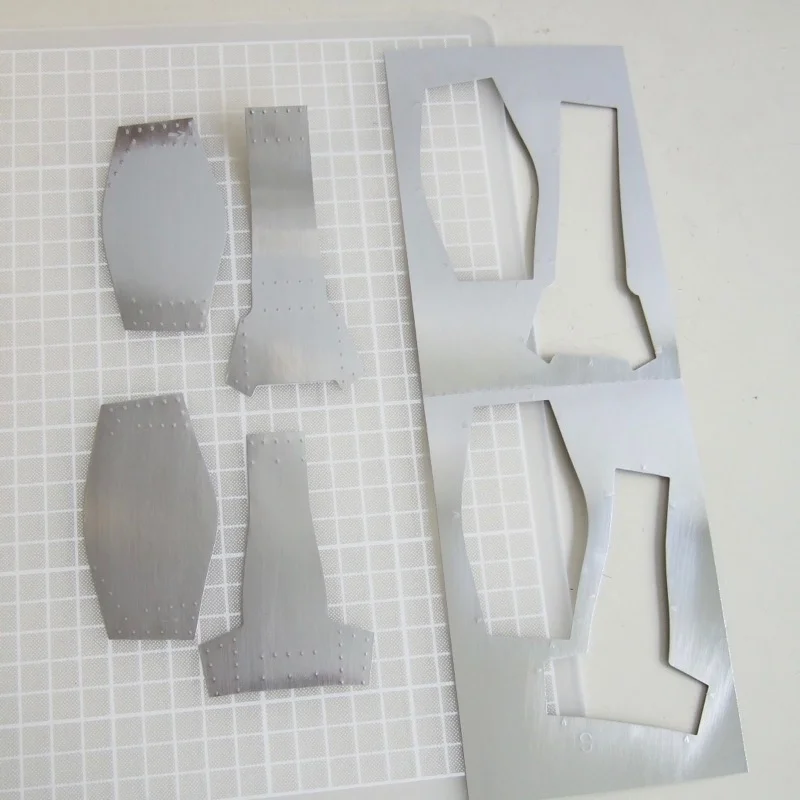
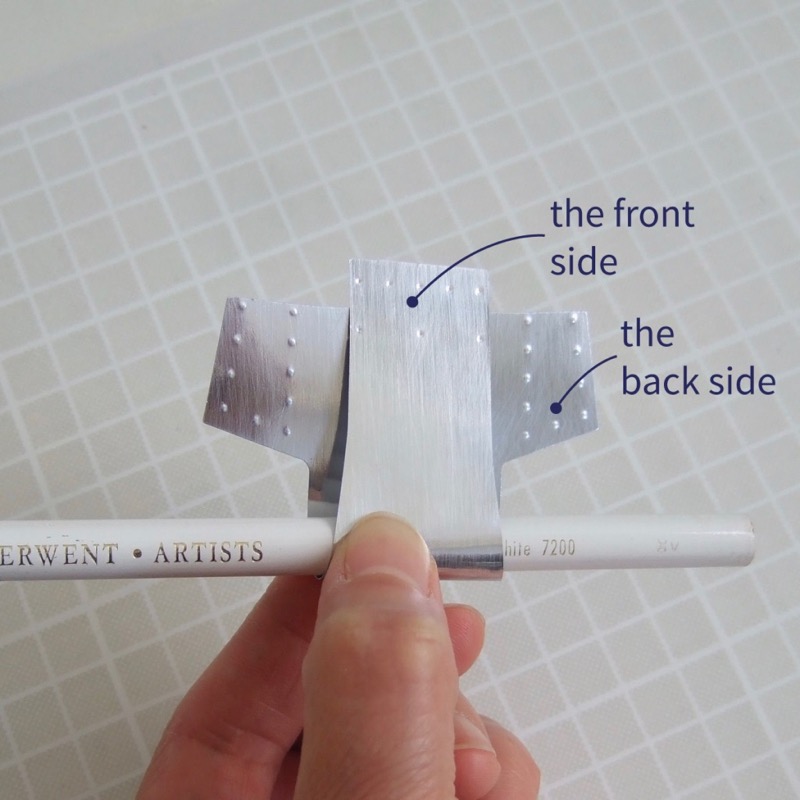
Before detaching the parts, rub the silver surface lightly with a scourer pad to make a fine ‘brushing’ or ‘hairline’ finish on the material of the chair. Test first, to make fine and straight ( not too rough or deep ) lines in the direction shown below, for both front and back sides. Front side is where you see that the dots are depressions.
写真上5枚)パーツを切り離す前に、ヘアライン加工をします。まず端のほうでテストしてから、表と裏の両方に写真の矢印の方向でヘアラインを入れます。ドットが凹んでいる側が表、凸出ている側が裏です。均一なヘアラインが入ったら、パーツを切り離します。


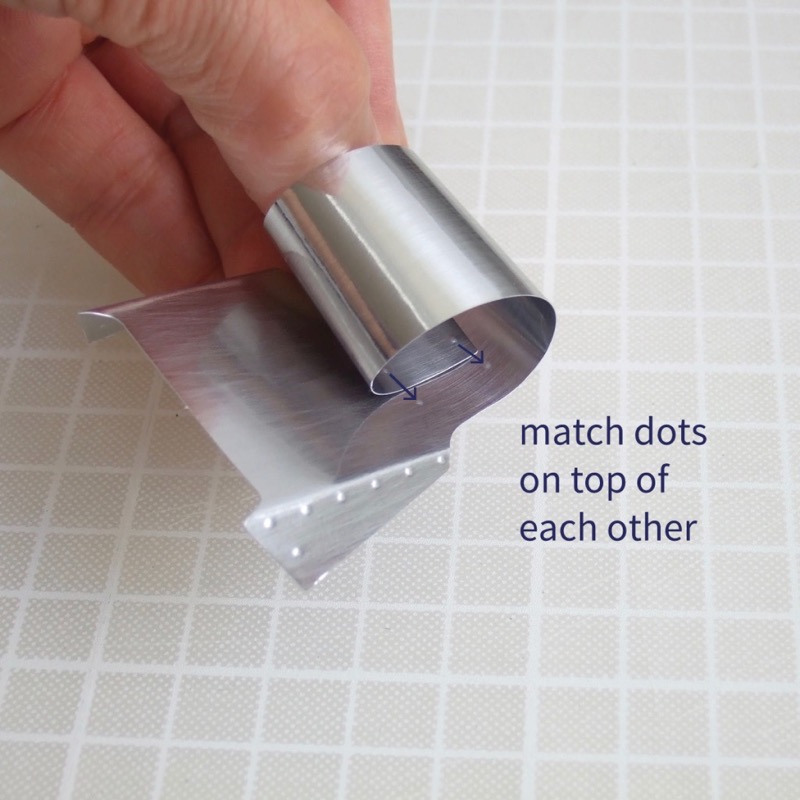

Curve the back part ( narrow and longest one ) and shape the loop with the front side out. Fold base connections into a right-angle with the edge of a ruler. Then shape the loop, match the dots and glue it to form the back of the chair. Make sure that the loop is centred and aligned correctly. Hold both ends with clips, leave it until dry.
写真上4枚)背パーツの上部を丸い棒などに押し付け、表を外にしてカーブをつけます。アーム部とのちに重ねる足元は、定規などに当ててドットをガイドに直角に折り曲げます。ループのドットを重ね、左右の残りの距離が均一になるように接着してクリップで押さえて乾くのを待ちましょう。


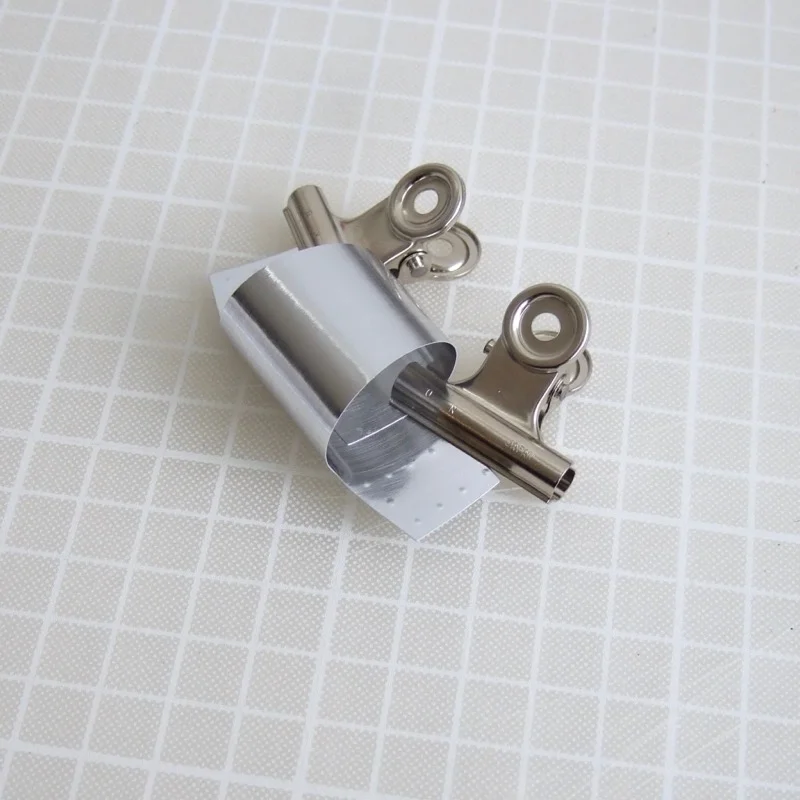
Next is the seat. Curve the part and shape the loop with the front side out. Fold base connections at a right-angle with the edge of a ruler. Then shape the loop, match the dots and glue it to form the seat of the chair. Make sure that the loop is centred and aligned correctly. Hold both ends with clips, leave it until dry.
写真上5枚)次は座のループです。背と同じように表を外にして丸め、脚部になる箇所を直角に折り曲げます。ループのドットを重ね、左右の残りの距離が均一になるように接着してクリップで押さえて乾くのを待ちましょう。


Curve the arm parts, shape the loops with the front side out. Arrows are indicating inside of arms, front. Match the triangle of dots of back part and the back of arm, glue them together with the bottom of parts aligned. Hold them with a clip each, leave them until dry.
写真上4枚)アーム部のパーツにある矢印は、椅子の前方を指しています。その矢印が両アームの中側にくるように表を外にしてカーブをつけ、背の下方に折った三角形の端がアーム部の後ろの線と重なる場所に、ドットを重ねて接着します。


Match the trapezium shape of dots of seat part and the front of arm, glue them together with the bottom of parts aligned. Hold them with a clip each, leave them until dry.
写真上2枚)アーム部の内側の矢印を隠す場所に座とつながった脚部を重ね、底のラインとドットが重なる位置に座を接着します。クリップで押さえて乾くまで待ちましょう。


The final step is gluing the bottom of the arms. Match the dots with the bottom of the parts aligned. Hold them with a clip each, leave them until dry.
写真上3枚)アーム部のループの形を整え、底を合わせてドットを重ねた位置で接着します。クリップで押さえ、乾いたら椅子の完成です。

The final step is to assemble the wall and floor. Please refer to How to assemble background, and it is complete.
写真上)背景を組み立ててジオラマの完成です。背景の組み立てはここを参照してください。