How to assemble Thonet 14 chair
トーネット14チェアの組み立て方

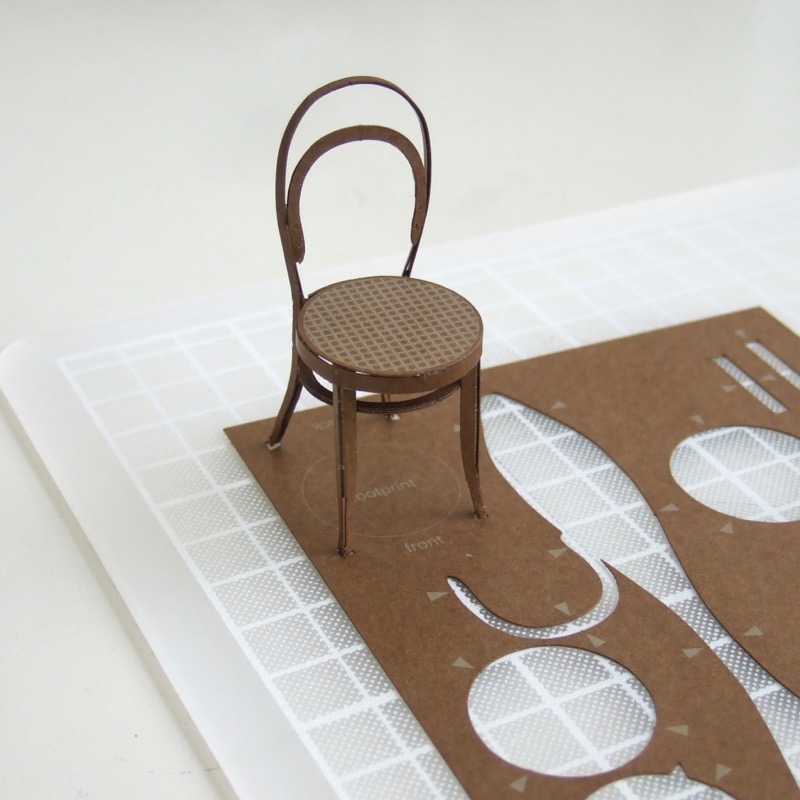
This is the 009 Thonet no.14 chair set after completion. Here’s how to build it…
写真上)トーネットno.14 チェアとその背景が組み上がったところです。順を追って組み立て方を説明します。


There are three cards in the package, together with assembly instructions. Detach all parts of the chair, using a craft knife/scalpel – connections are indicated by little triangles. Keep the card after you detach the parts, as you will use it for a template.
写真上2枚)3枚のカードと組み立て説明書が1セットです。まず、椅子の台紙の三角形で示している「つなぎ箇所」をカッターなどで切り落とし、パーツを外します。残った台紙も組み立てに使います。


First of all, glue three rings together, making the one with the points in the middle. This will be the ring under seat and indication for attaching legs.
写真上2枚)まず最初に、座の下に位置する輪になる、3枚のパーツを重ねて接着します。脚部のガイドになるツノが出ている輪を真ん中にして重ねます。
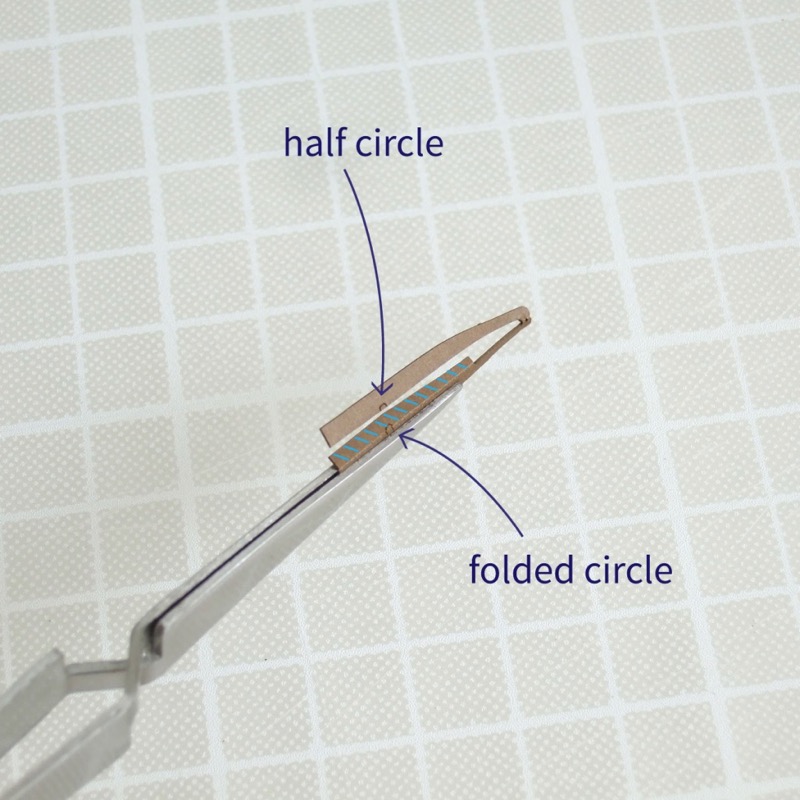

Front legs next: Pinch alongside the folding line with tweezers, fold the gluing tongue into a right-angle and apply glue at the hatched area. Connect two indications – both tiny half circle and folded circle. Repeat the process for the other front leg.
写真上2枚)次に前脚を組み立てます。小さな点を起点に折、のりしろをまっすぐなピンセットか定規などに添わせて曲げ、丸い印が重なるように直角に貼り合わせます。


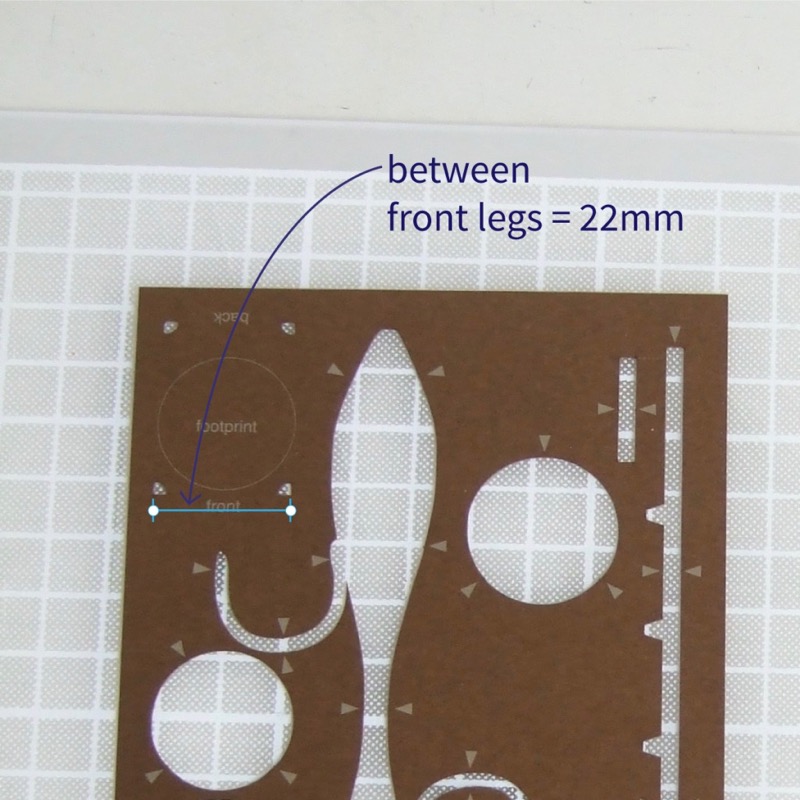
Glue front legs to the rounded points on the ring, at the level of tiny circle mark. Keep them parallel and 22 mm apart ( as shown on the template on the card. ) Make sure the legs are at right-angles to the ring.
写真上3枚)接着剤が乾いたら、前脚2本を輪の先が丸いほうの2つのツノに接着します。さきほど接着の目印にした丸が、輪と接着する位置です。接着が乾くまで、脚が平行になって脚先が22ミリぐらい離れ、輪が脚に垂直になるように置いておくと正確です。


Curve the under rim of the seat – press the strip against a round object. Then fold gluing tongues at the small holes, also the end of the rim at the indicating hole.
写真上2枚)座の枠になるパーツに丸い棒などでカーブをつけ、のりしろを内側に折りこみ、小さな丸い穴のある端を、直角に折り曲げます。


Glue the first tongue to the seat and wait for it to dry. Then continue to glue the seat to the rim as in pictures below.
写真上5枚)折り曲げた端を左上にして、画像のように最初のひとつを接着し、乾いてから順を追って座面を枠に接着します。


Make the folded end of the rim turn out, then add the end-folded and curved small piece, as indicated below. The size of the seat is correct if one of the gluing tongues is in the middle of the two tabs.
写真上4枚)枠のパーツの端を折り曲げたところを枠から直角に突き出すように立て、その折り目を起点にしてもう1枚の小さなパーツを重ねて貼り足します。この時、小さなパーツの端も丸い印で折り立てて、あとで後ろ脚を貼り付けるためのタブ(つまみ)が2つ、上記写真の位置で突き出ているようにします。
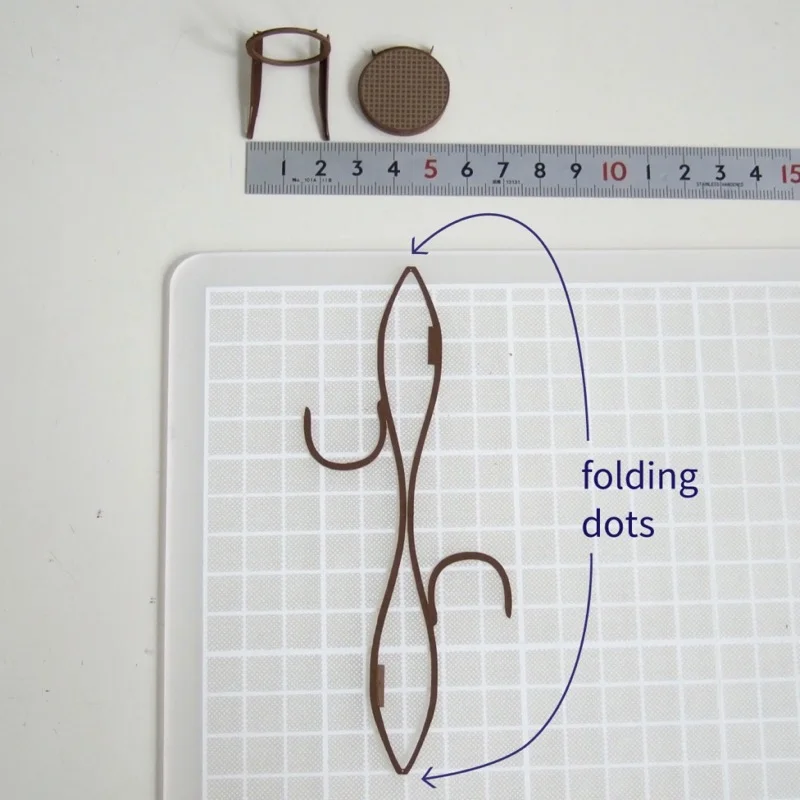

Fold back bow part at small dots on both ends, then fold two gluing tongues.
写真上2枚)背と後ろ脚になるパーツを上下の丸い印で半分に折り、2箇所にあるのりしろを直角に折り曲げます。


Holding the centre of the folded part, bring the two ends down to shape the back bow of the chair.
写真上2枚)背のカーブになる中央部分の真ん中を持って、背と脚につづく曲線を形づくってみましょう。


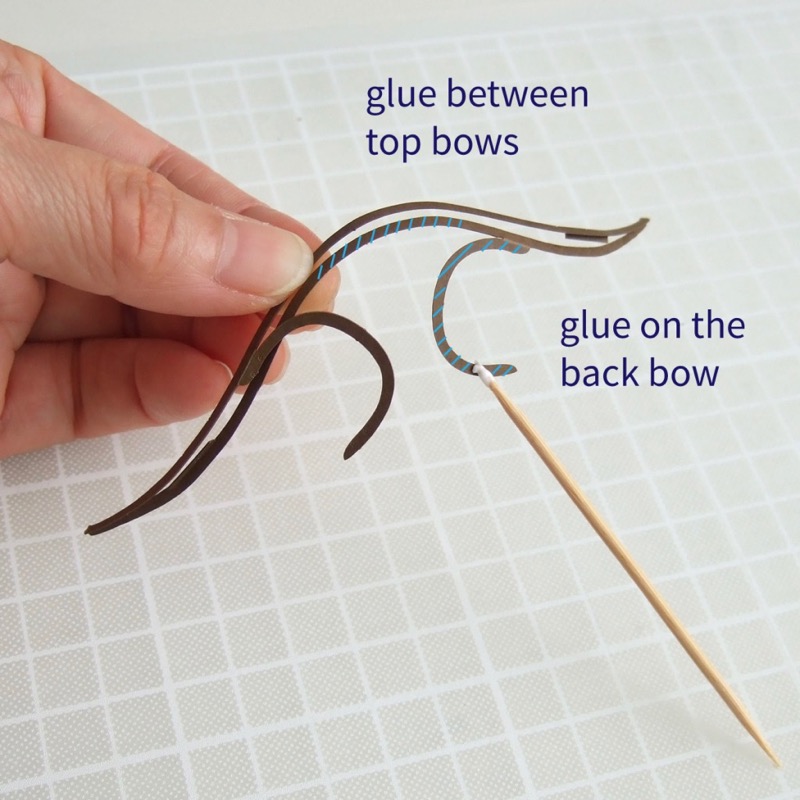
Fold the inner bows towards the centre – one to show laser circle mark in front and the other behind it. Then glue the two inner bows together, as shown below.
写真上3枚)背の「当たり」になる小さい方の曲線は、リベットの印が両はしについた逆U字のパーツを重ねて貼り合わせます。その部品を接着する時に、同時に背のおおきな曲線も接着し、乾くまでにオリジナルの写真を参照しながら形を整えましょう。


Before the bows are dry, shape the top bow in a good Thonet curve ( refer to picture at the introduction link ). Then glue two tongues below the bow. Press the glued part until dried, and here a ∧ shape is opened from the front view.
写真上4枚)背の曲線が整ったところで、後ろ脚ののりしろを接着します。背後から接着して、前から見た時に逆V字が手前に向かって開いている形状です。


Glue back legs to the seat – upper mark and the two tabs are the indication, and ∧ shape encloses the tabs. Repeat the other side, make the connecting T-junction in the right-angles and leave them until dried.
写真上4枚)後ろ脚と座を接着します。後ろ脚にある2つの丸印のうち上の印と座から突き出でたタブ(つまみ)の中心が揃う位置で、脚の逆V字でタブを包むように接着し、乾くまでクリップなどで押さえます。この時、つなぎ位置で脚と座が直角になるようにしましょう。

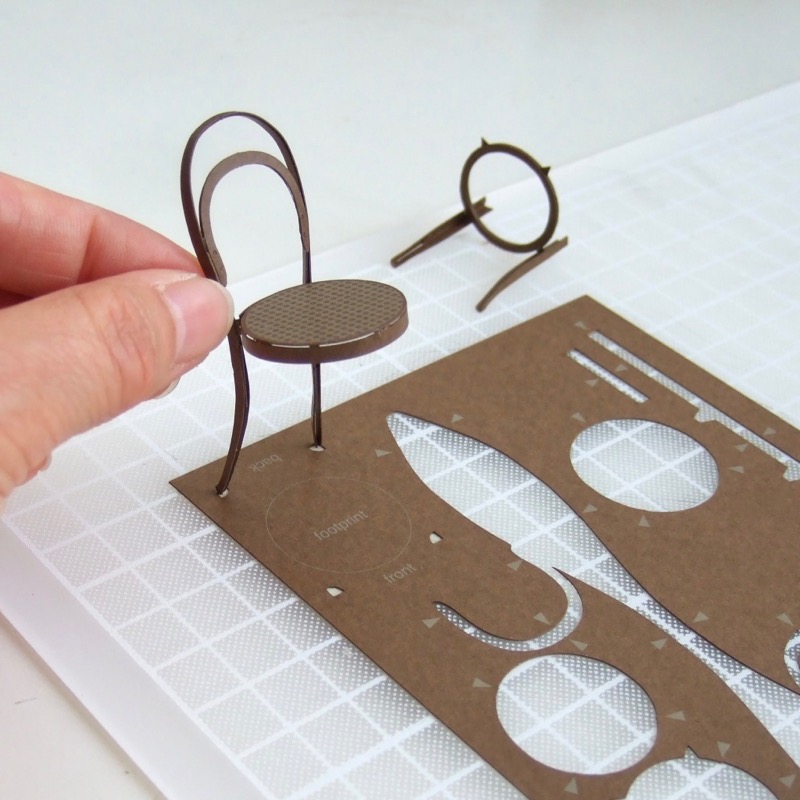
Turn the remaining card front to back, place pieces of tape against four holes of the chair footprint. Turn the card, then locate the back legs in the holes.
写真上2枚)椅子パーツを切り出したあとの台紙を裏返し、フットプリント(脚部の接地位置)を記した4つの穴を裏からマスキングテープでふさぎ、表に返して後ろ脚を穴の外コーナーに添わせます。
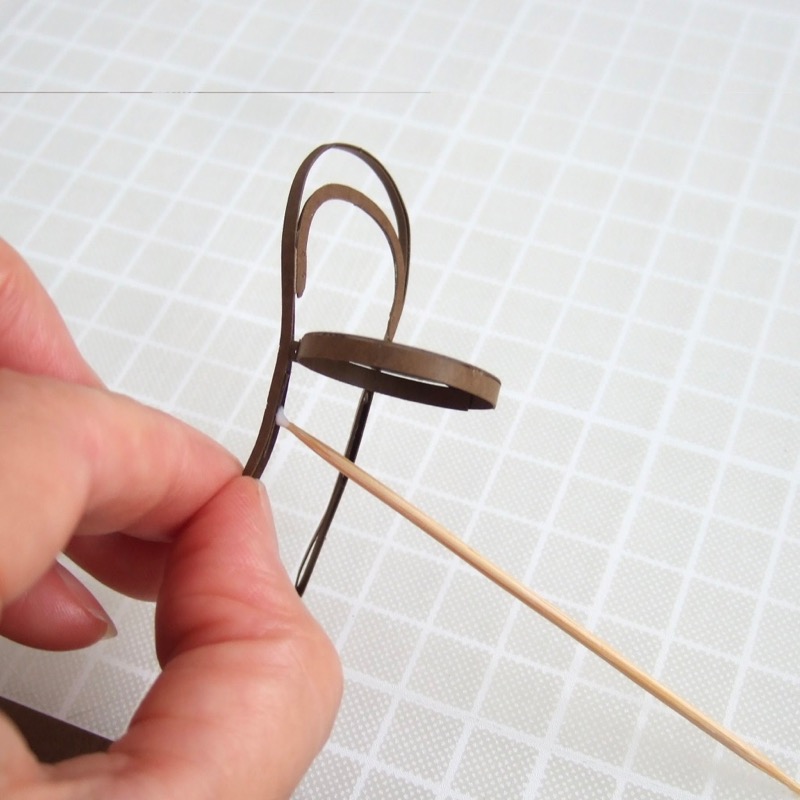
Apply glue to the inside of ∧ shape at the lower marks of back legs, place the ring with front legs in position – level to the mark. Locate the model back to the footprint.
写真上2枚)後ろ脚の残った丸い印の位置に輪と前足を接着します。手前側から開いている逆V字の中に接着剤を入れ、輪の2つの尖ったツノをさしはさみ、一旦前足を台紙のテンプレート上に置いてみましょう。


Before the back connections are dry, apply glue at the top of front legs, place them inside of the seat and place front legs in position of the footprint template. Additional glue to reinforce the connections might help to keep the chair in a good shape. Leave the chair in the template until all joints are dried.
写真上3枚)後ろ脚と輪の接着が完全に乾く前に、前足の上部に接着剤を置いて前足を座の内側に入れながら、前足が座の天板の裏に届くまで押して接着します。前足の先が台紙のテープ穴の手前角にくるように全体を調整し、左右のバランスなどもこの時に整えます。4つの脚先を穴に入れたまま、見えない位置で接着剤を盛ると補強になります。
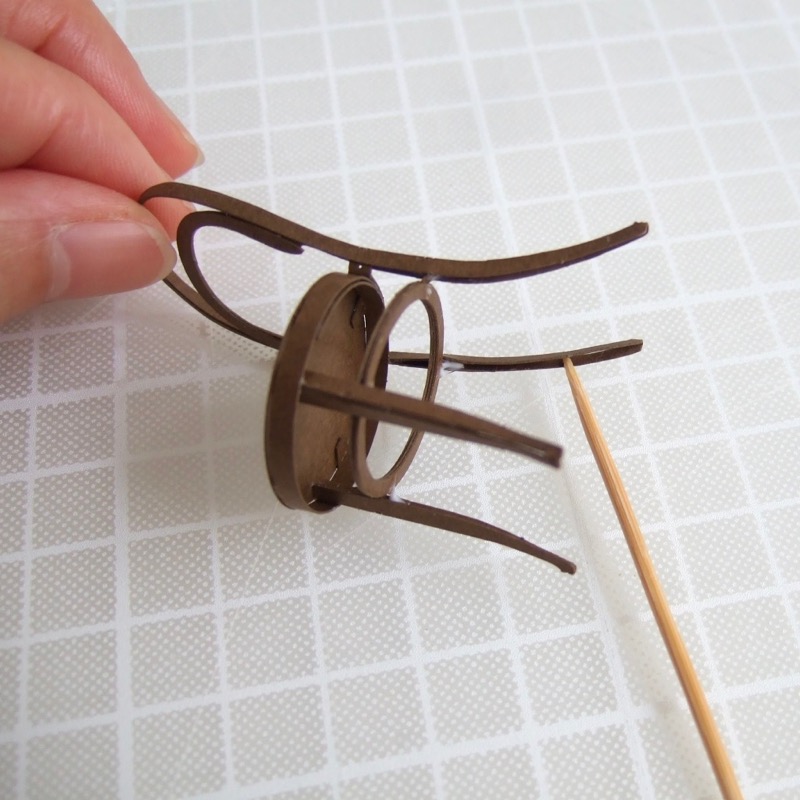


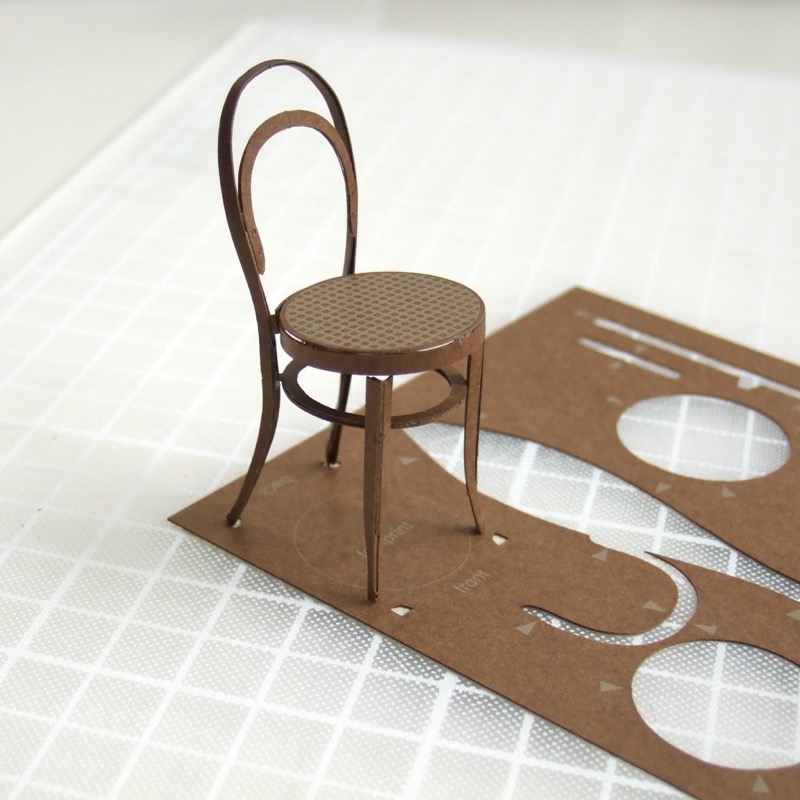
The last touch – apply glue to close the gaps on the bottom of back legs. Best to leave in the template until dried completely.
写真上3枚)最後の仕上げに、後ろ足の隙間が開いている箇所を裏から接着剤で閉じ、台紙に置いて脚が床から浮かないように形をととのえ、補強の接着剤が完全に乾いたのちに台紙から外して、椅子の完成です。
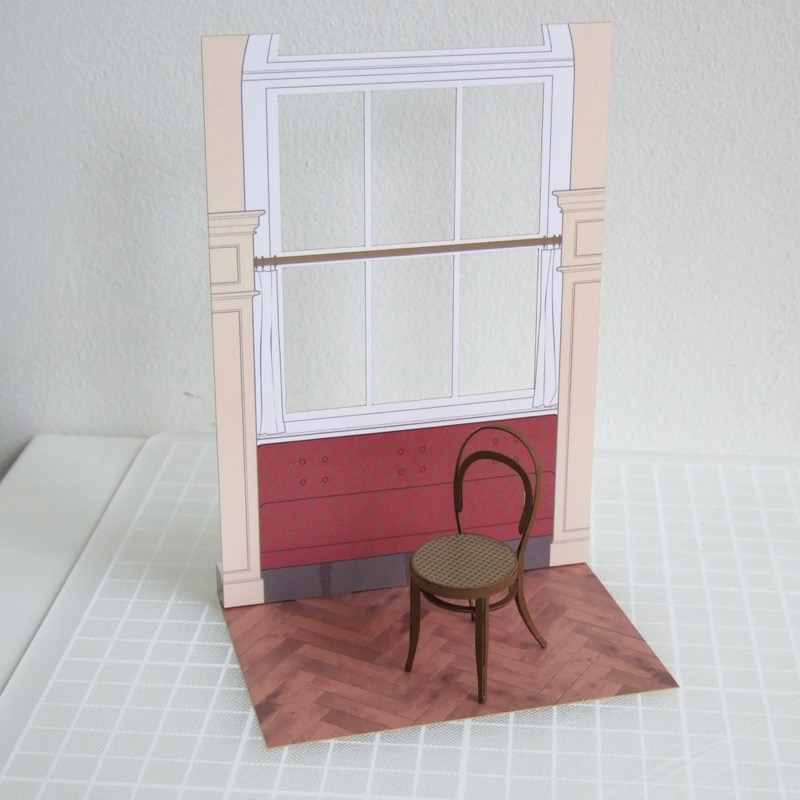
The final step is to assemble the wall and floor. Please refer to How to assemble background, and it is complete.
写真上)壁と床を組み立てると完成です。詳細は背景の組み立て方を参考にしてください。