How to assemble Plywood chair
プライウッドチェアの組み立て方
005 Plywood chair
Watch the video above or follow the step by step guide below to complete your 005 Plywood chair diorama.

This is the 005 Plywood chair set after completion. Here’s how to build it…
プライウッドチェアとその背景が組み上がったところです。組み立て方を順を追って説明します。

There are three cards in the package, together with assembly instructions. Detach all parts of the chair from the second card, using a craft knife/scalpel – connections are indicated by little triangles.
この3枚のカードと組み立て説明書が1セットです。まず、レーザー加工されている厚紙から、小さな三角形で示している「つなぎ箇所」をカッターなどで切り落とし、パーツを外します。

The picture below shows a set for the left side of the chair, made with three layers of card. Glue them together, with wood grain printed sides facing outwards. Continue to glue the other side, a mirror of the first one.
次の写真は、椅子の左側になる部品で、3層を重ねて接着して作ります。その時に、木目の印刷がある面を外にして、真ん中の一層は木目のないものを使用します。左右対称の椅子の右側の部品も同じように作ります。

Apart from the seat, all other parts are made with 3 layers. For the front and back stretchers under the seat, the wood grain print and location marks for the cross pieces are facing outside, as shown in the two following images of both sides of the same piece.
座を除き、他のパーツは3層を接着して作ります。座の下、前と後ろにくる2つのパーツは、同じ長さのものを選び、木目と木ネジがある面と、接着のための位置表示のある面を外側にして3層を重ねます。


When all parts are dry, you can start to assemble them – back stretcher under seat is glued on first, wood grain out, thus location lines facing in. Then fold and glue the under-seat cross, slightly curved line facing upwards. Apply glue to top corners, also between location lines under the seat, then place cross up-side-down, leaving equal spaces to the edge of seat. See photo’s below to clarify.
すべてのパーツが接着されたら椅子に組み立てます。まず、座の後ろにくるパーツを木目を外、2本線がある面を内にして端に接着します。次に、座の下にくる十字を組み合わせて接着し、カーブがある面を上にして端だけに接着剤を少し付け、座の下の2本線の間にも接着剤をつけて貼り合わせます。その時、座面に残る距離が左右同じになるよう注意しましょう。


Attach front stretcher under the seat and glue both sides of leg parts to the seat.
座の下、前面のパーツを貼り、左右の脚部分も組み立てて貼り合わせます。

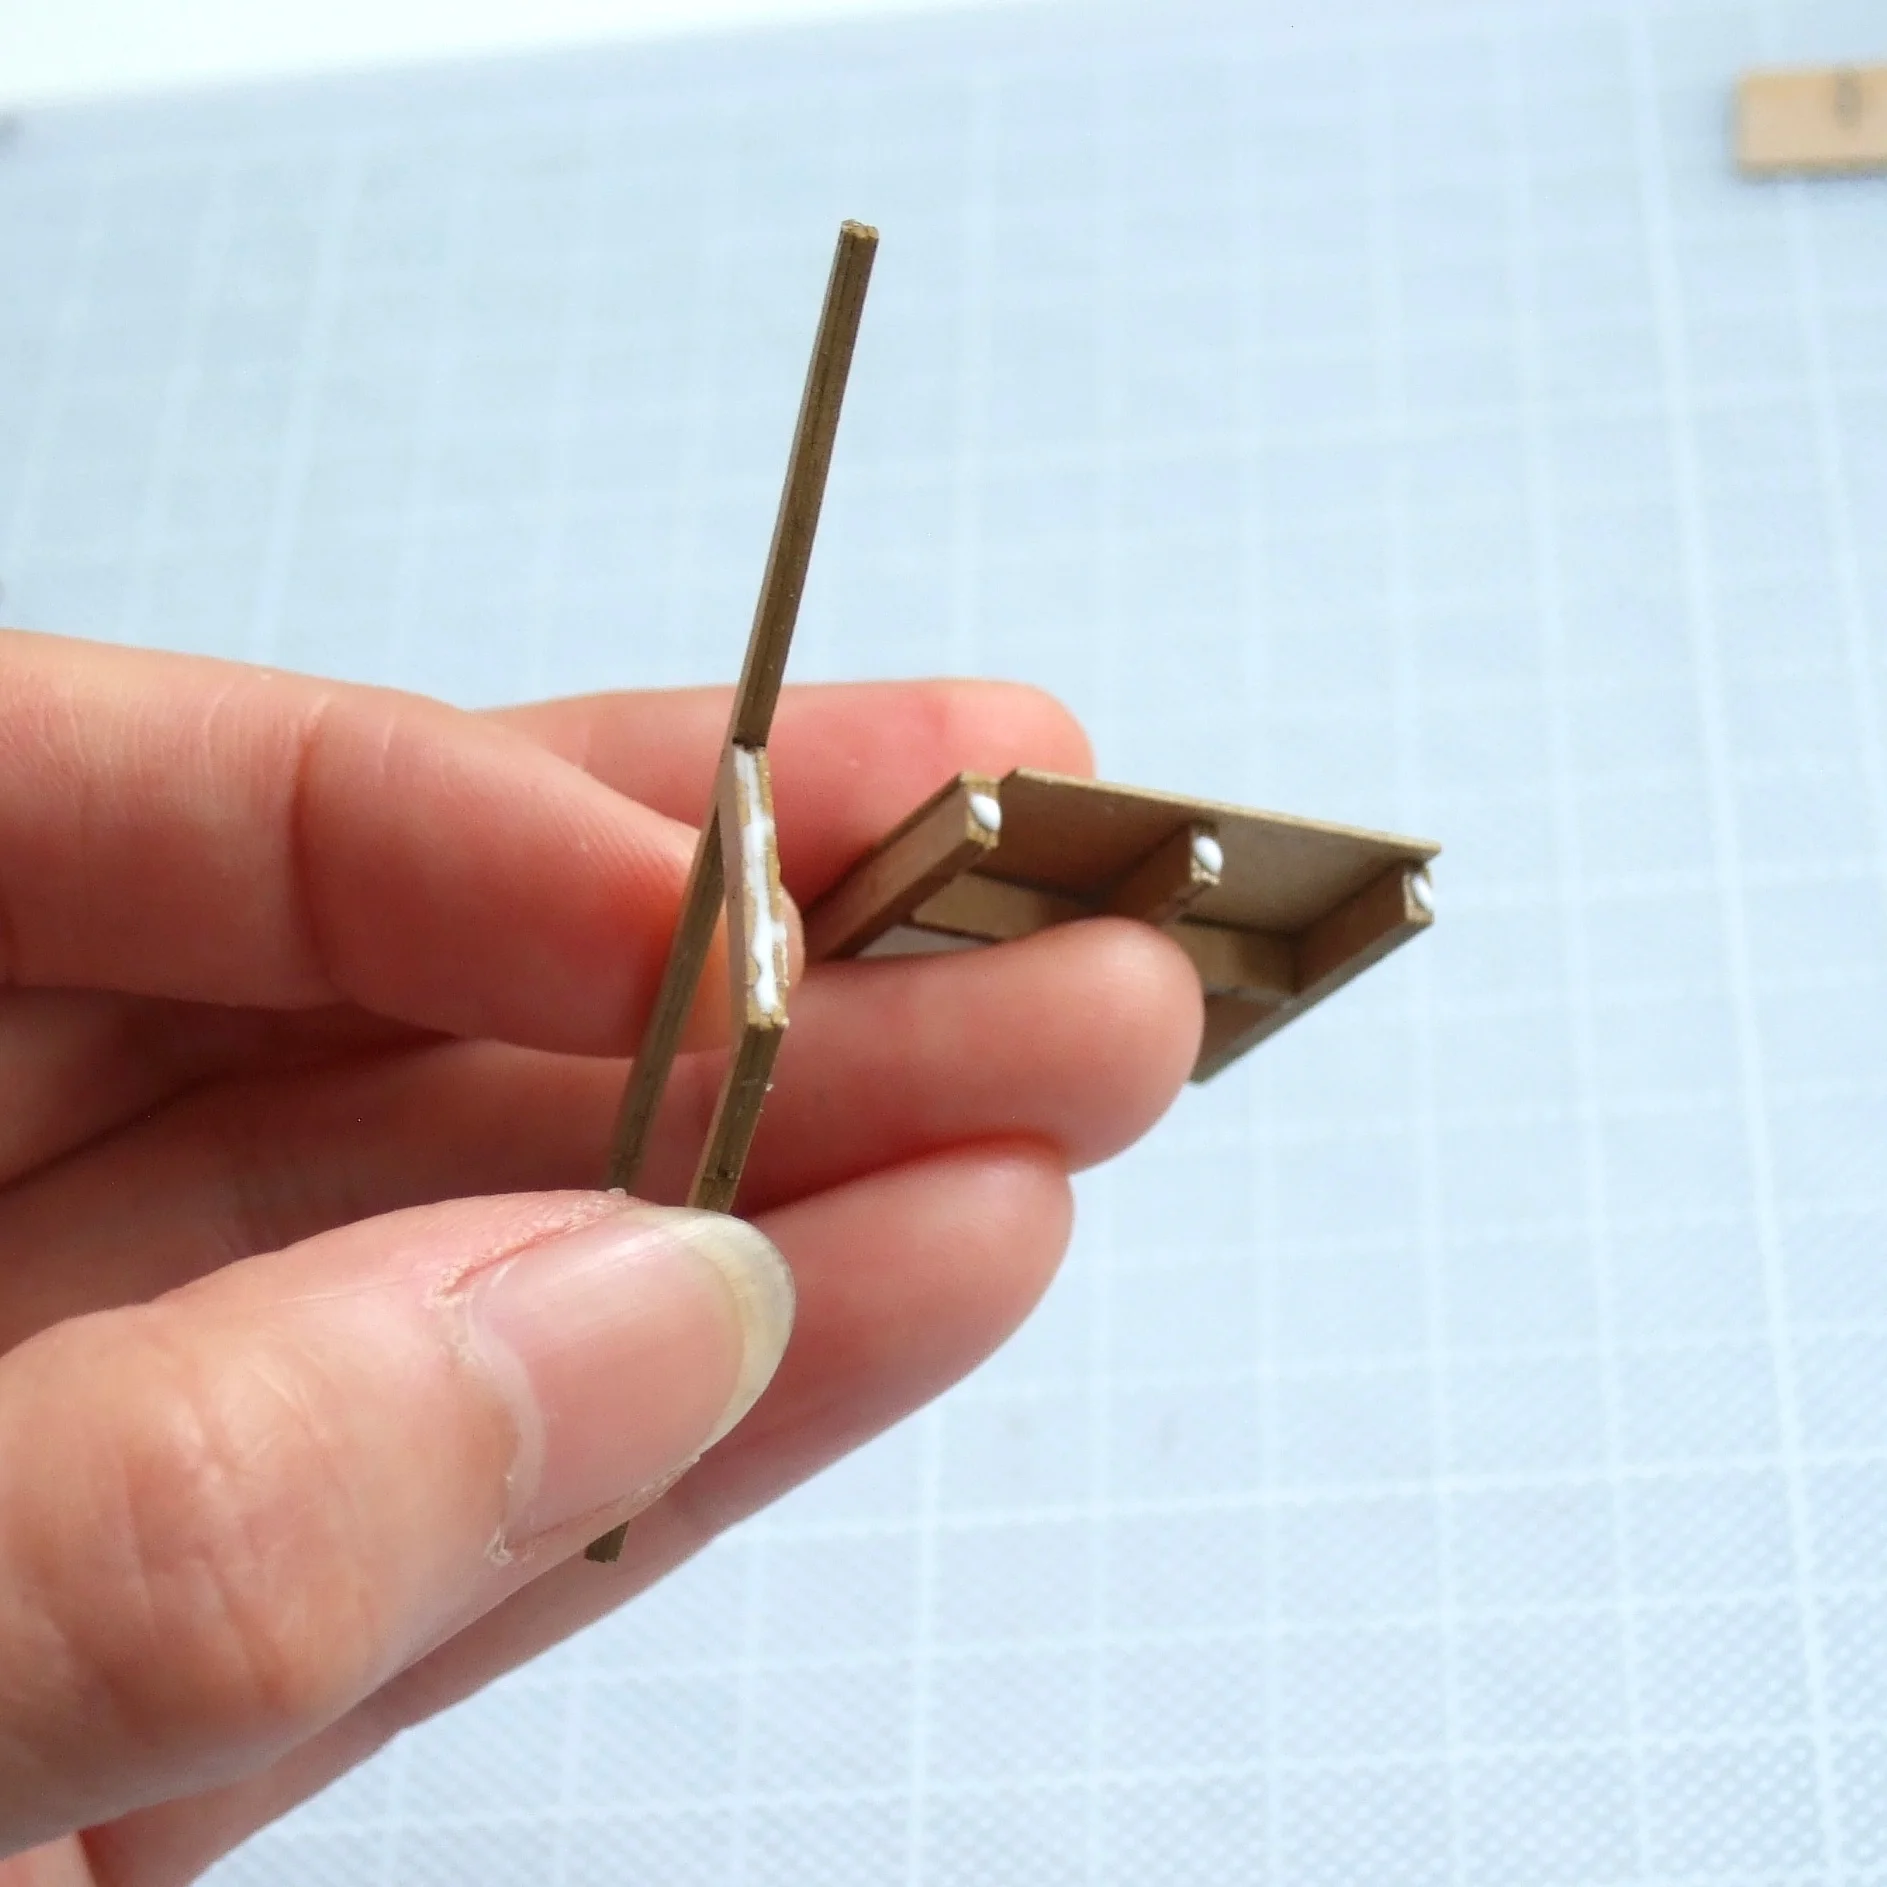
When the four legs of chair are nicely dried, apply a small amount of glue inside the top ends, place the top bar the wood grain facing top, and hold it until it dries.
脚部の接着が乾いたところで、背の上部、内側の印のある箇所に少しだけ接着剤をつけ、背の上にくるパーツを木目のある面を上にして貼り付けると完成です。


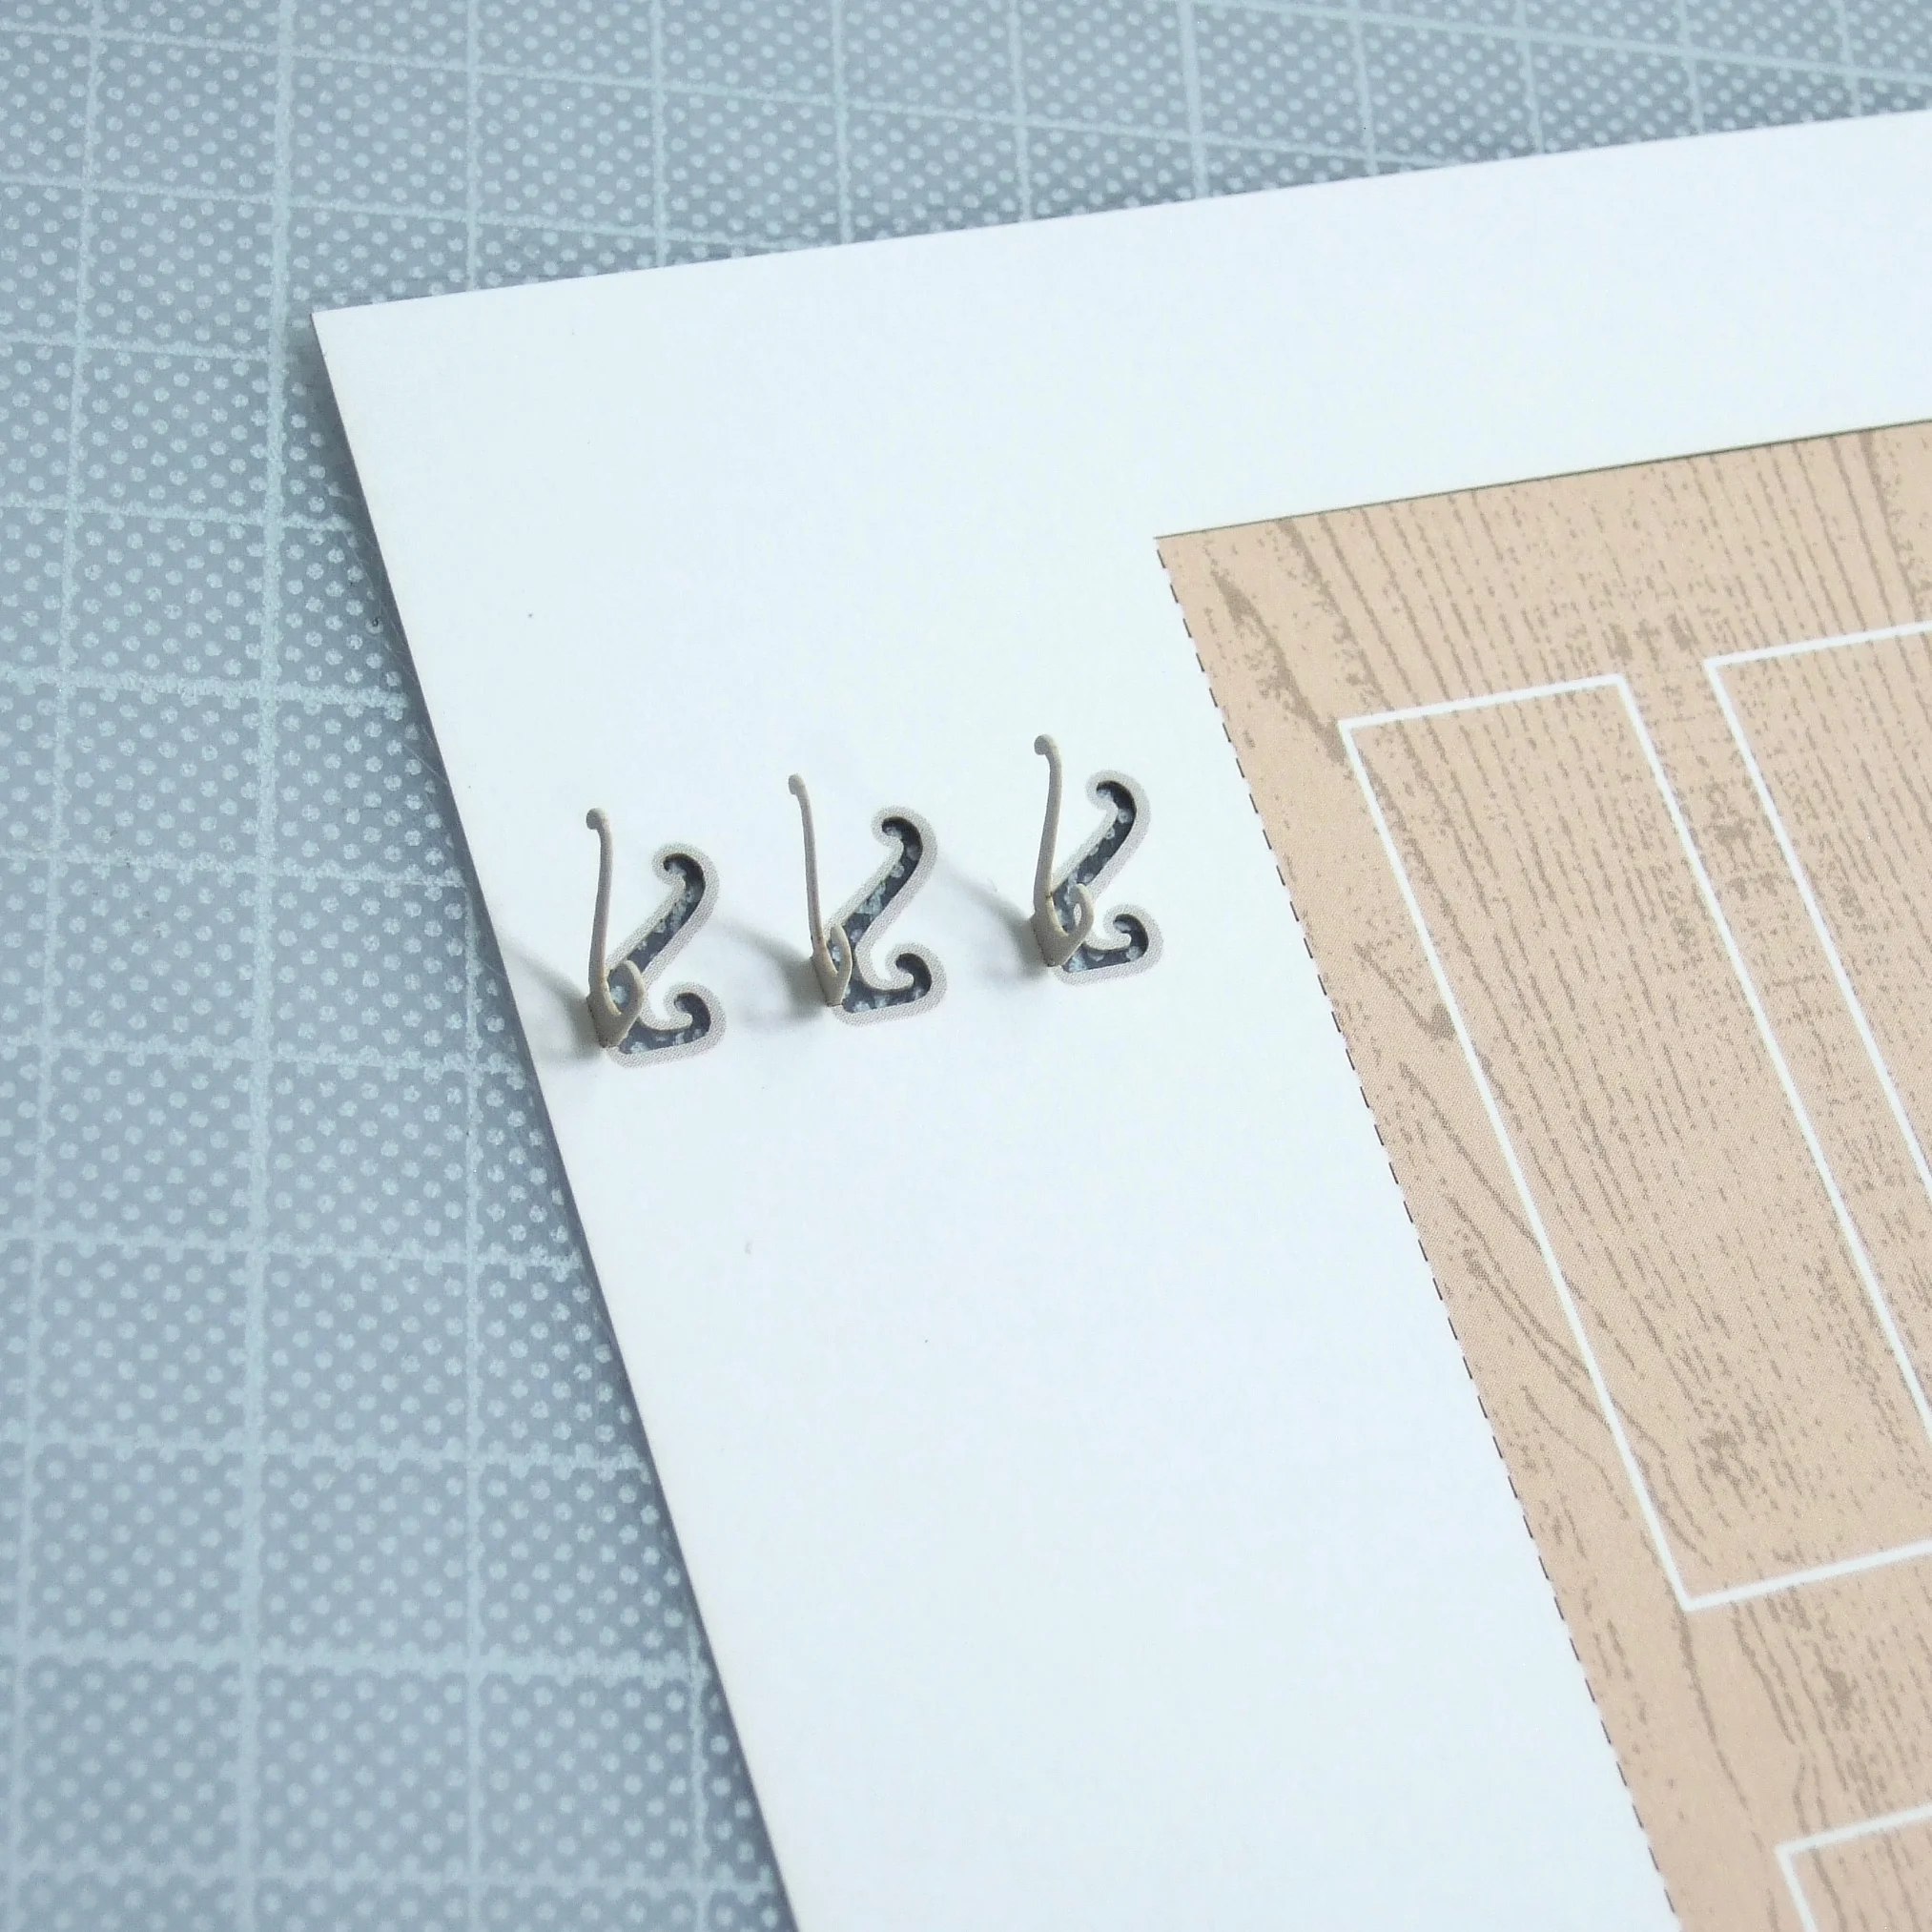
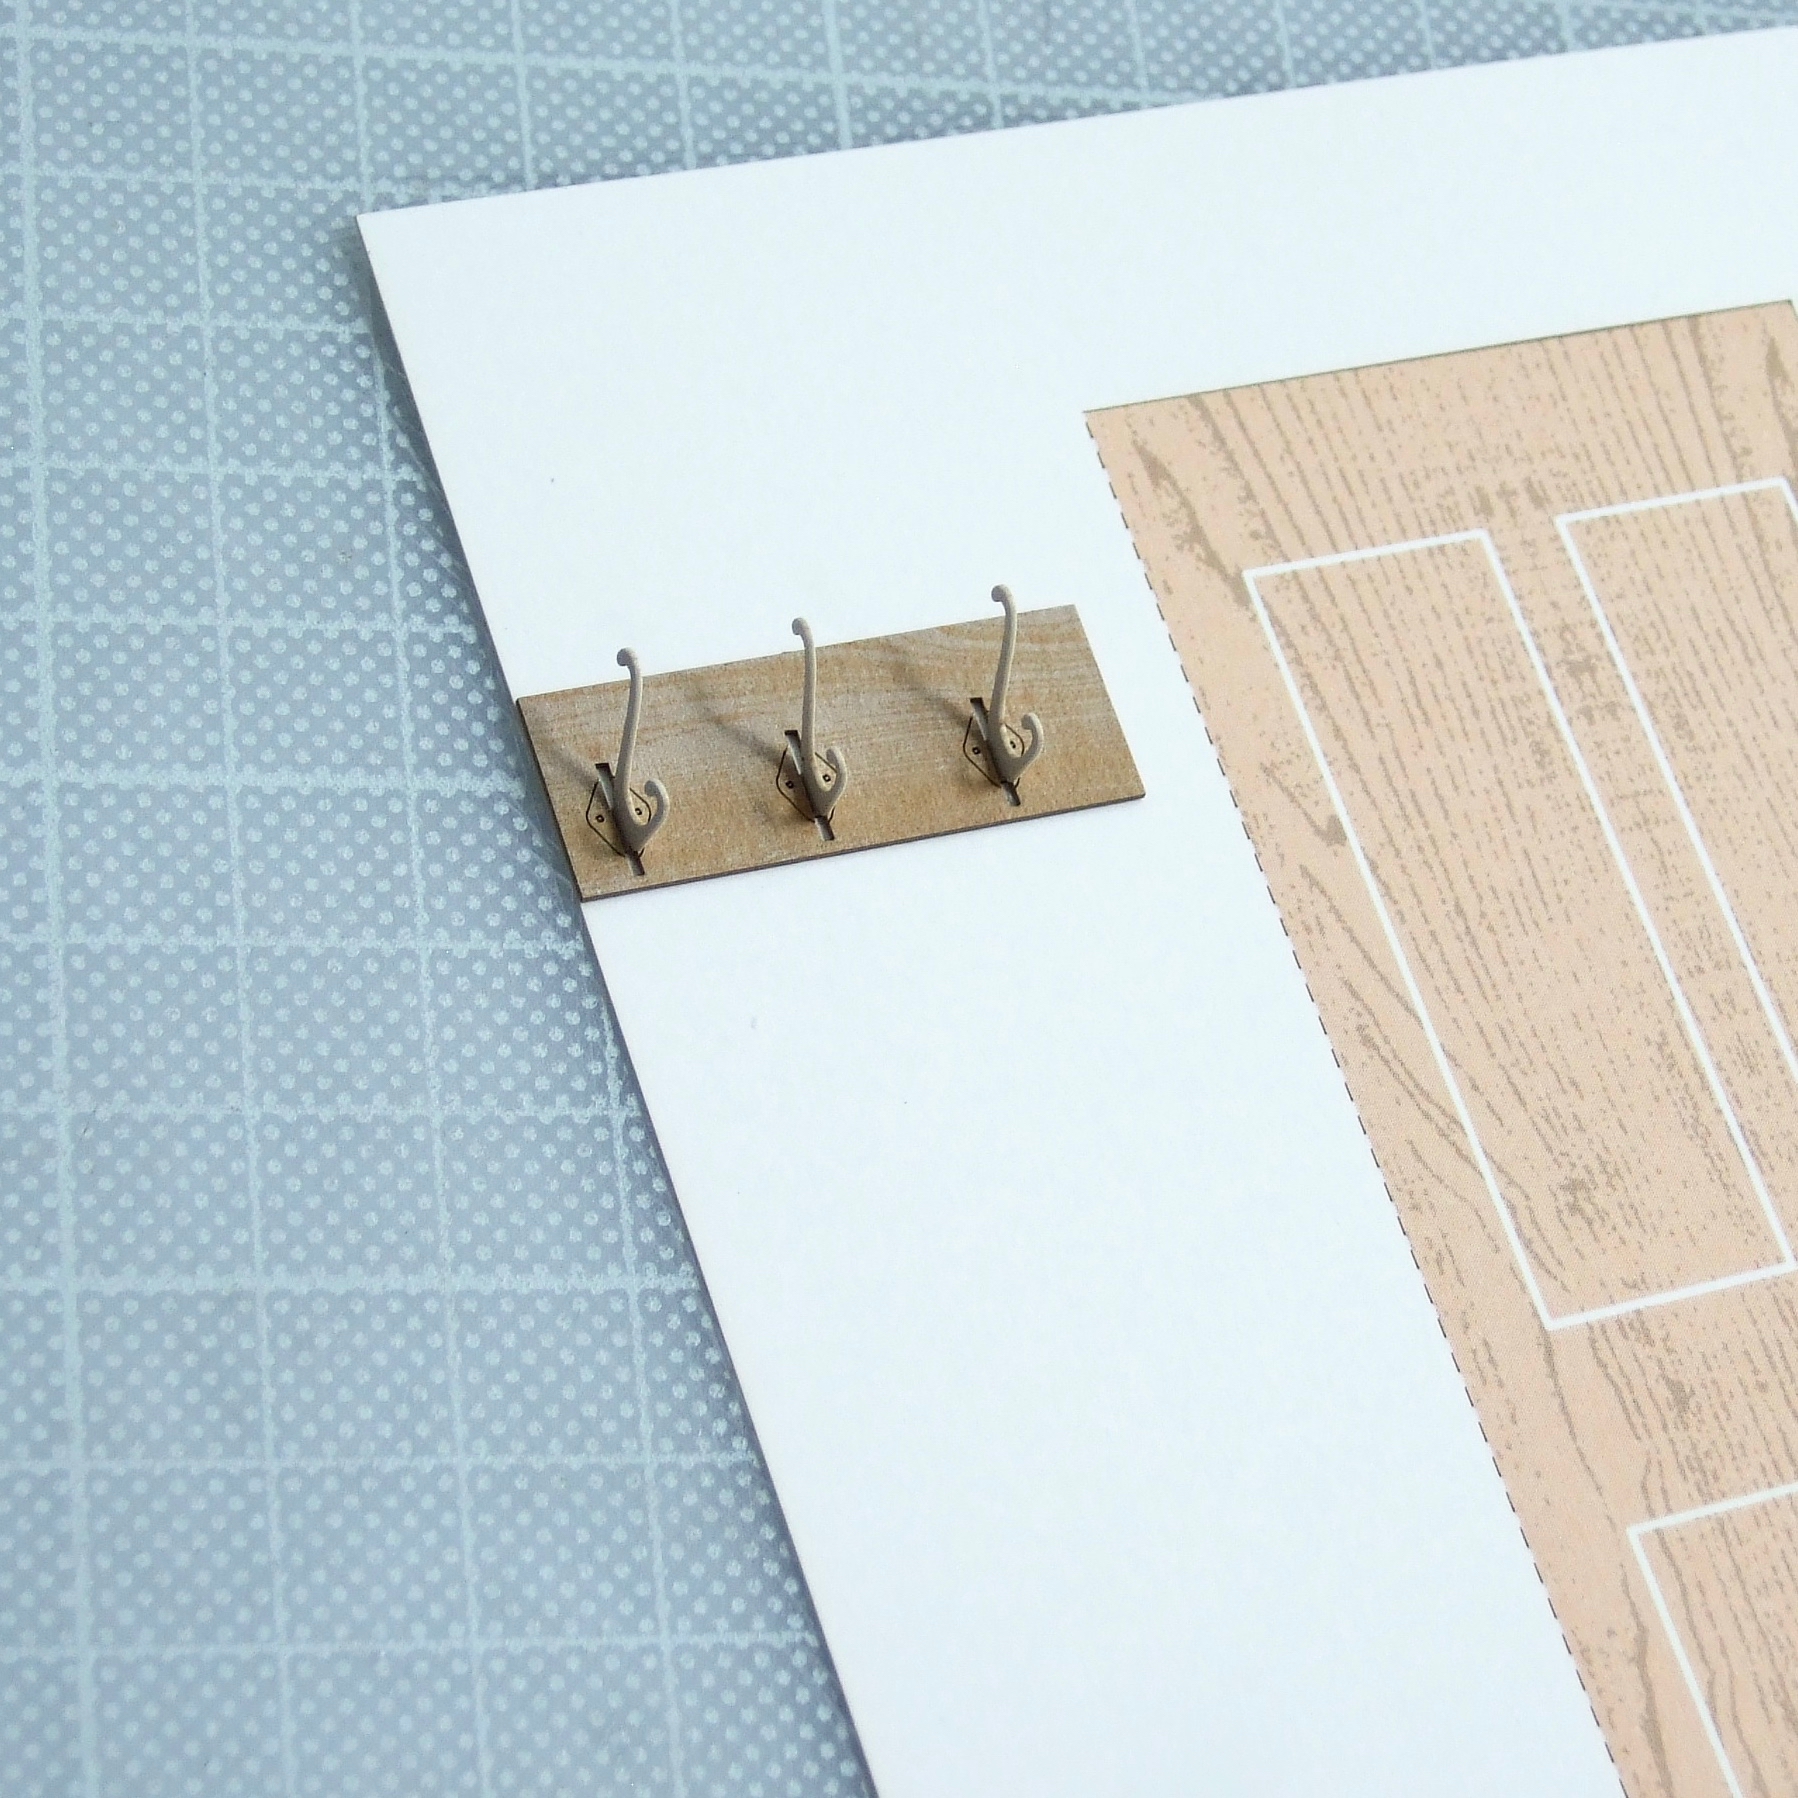
The chair is complete! Next step is the wall hook. Press the three cut-out wall pegs from behind using a pointy tool. Then insert the wall plate, the last part from the chair card, through pegs and glue it in position hiding the holes and printed colour.
椅子が完成したら、次は壁のフックです。切り抜かれている3つのフックを先の尖ったつまようじなどで後ろから押し出し、椅子の部品のカードから切り出した最後のパーツの切り込みをくぐらせて壁に当て、印刷を隠す位置に貼ります。

Valley fold the dotted line to open the door. Then mountain fold at the bottom line of the wall, shown with arrow.
左の点線で谷折りにしてドアを開け、壁のパーツの下の部分を矢印のところで山折りにします。

Fold floor part as shown, then apply glue at indicated areas and place the floor part on the back of the wall part at the line shown with the arrows. Turn the floor part around then insert the two tabs into the slots below the front of the wall – it is best to insert both at the same time. Please refer the link How to assemble background for more detail.
下の写真は床のパーツを裏から見たところです。破線を谷折りに折り曲げ、ピンクの斜線の部分に接着剤をつけたのち、床の印刷面を上にして、壁のパーツの矢印の線に合わせて貼り合わせます。接着が乾いたら床パーツを手前に折りこみ、ツノ状の2つを壁パーツの下にある切れ込みにさしこむと完成です。詳細は、背景の組み立て方を参照してください。


When you place the chair in the scene, the diorama is complete!
椅子を置いてジオラマの完成です。