How to assemble Ming chair
明朝の椅子の組み立て方

This is the Ming Dynasty chair diorama after completion. Here’s how to assemble it.
写真上)明朝の椅子とその背景が組み上がったところです。順を追って、組み立て方を説明します。組み立てに必要な道具と接着剤はこのリンクを参照してください。


There are three cards in the package, together with assembly instructions. Detach all parts of the chair, using a craft knife/scalpel – connections are indicated by little triangles.
写真上2枚)3枚のカードと組み立て説明書が1セットです。まず、椅子の台紙の三角形で示している「つなぎ箇所」をカッターなどで切り落とし、パーツを外します。


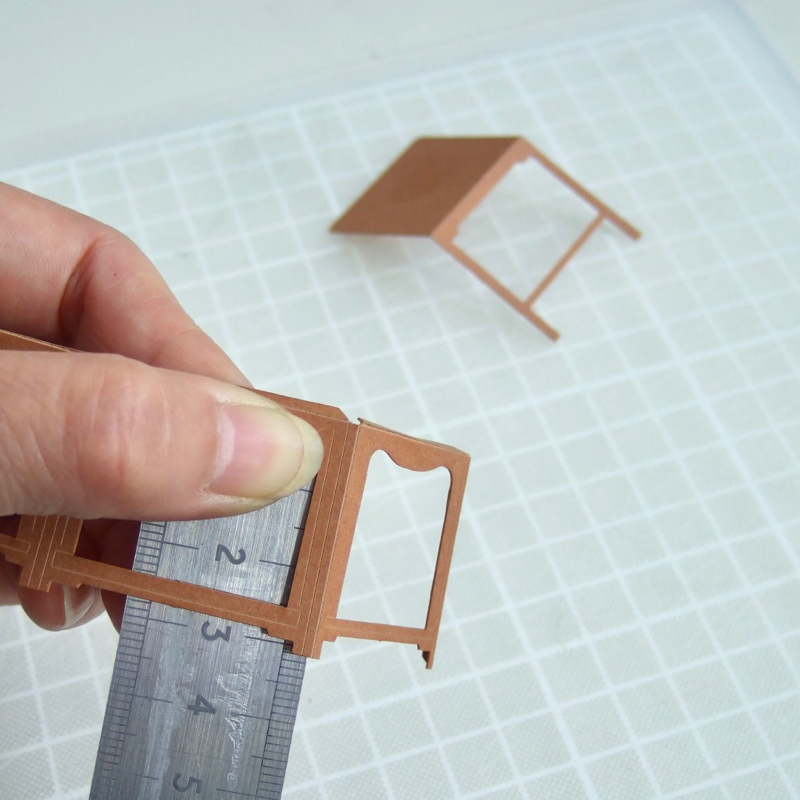


Assemble base/legs part first. Fold along engraved lines. Place the edge of a ruler behind the engraved line – this helps to make the fold easier and more precise. Be aware that there are dual folding on two front corners. After you attached back side of the base, apply glue on the hatched area and close the top.
写真上6枚)座の下の土台になる部分を最初に組み立てます。ハーフカット線を定規などの直線に沿わせて曲げるときれいに折れます。まず座と後ろ面を折って形づくります。3面が横に並んでいるのが前と側面で、この部品は2本ずつの折り線で立体的に折り曲げ、上部ののりしろも折りこみます。まず左右ののりしろと後ろ面を接着し、最後に斜線で示したのりしろへ座面を接着して長方形の形を整えます。


Attach the frame on the seat, place the long slot on the back and match the back line to the edge of the base – as shown below.
写真上2枚)座面の上に長方形の枠を接着します。背もたれ板のための細長い長方形が後ろになるよう配し、横から見た時に枠の後ろは土台の後ろ面と揃っていて、枠の前が少しだけ土台からつき出ているように、上から見た時に左右が対称になるよう乾く前に調整します。


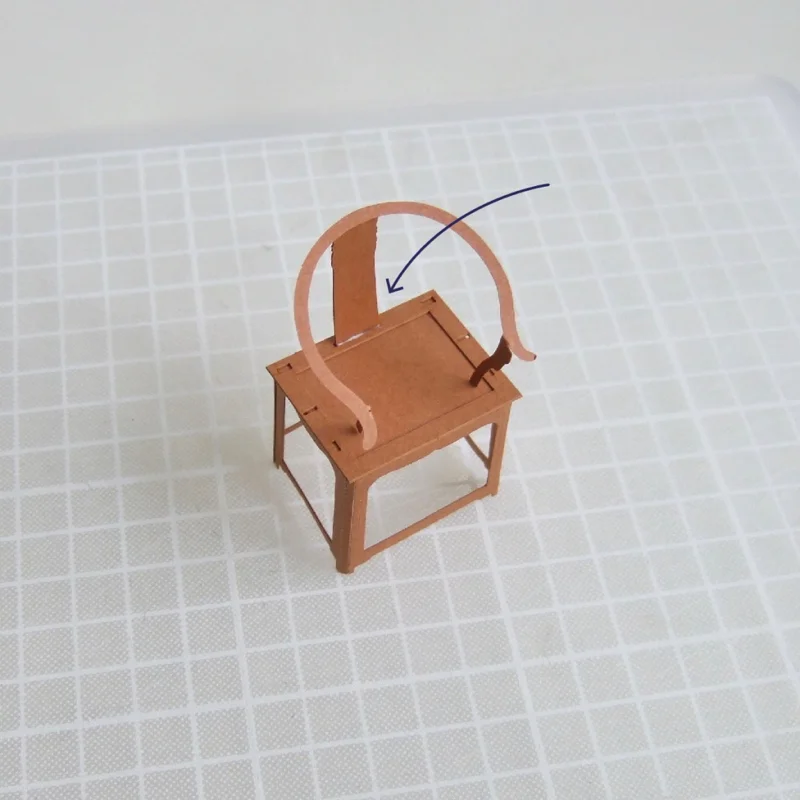
Place arm part on the side of engraved location marks on top, fold arm supports up at small holes. Then glue slightly curved back slat in position, put a supportive weight to keep about 45 degree angle, wait until dried.
写真上3枚)アームになる曲線の部品を、ハーフカットの印が上になるように置き、アームの支柱2本を穴の場所で直角に折り曲げます。背もたれ板に少しだけカーブを付け、印に重ねて接着し、約45度の角度で左右が対象になるように木片などで支えをして乾くまで待ちます。

Glue the bottom of back slat on the center of the seat frame. When this is dry, apply glue to the two front rectangular holes, push out and locate both arm supports in the holes and hold in position until dry.
写真上2枚)背もたれ板の下側を座面の枠の後ろの細長い穴に入れて接着し、乾いたら手前の穴2つに接着剤を置き、アームの支柱2本を内側から外に押すようにして穴に落としこみ、しばらく押さえて接着するまで待ちます。


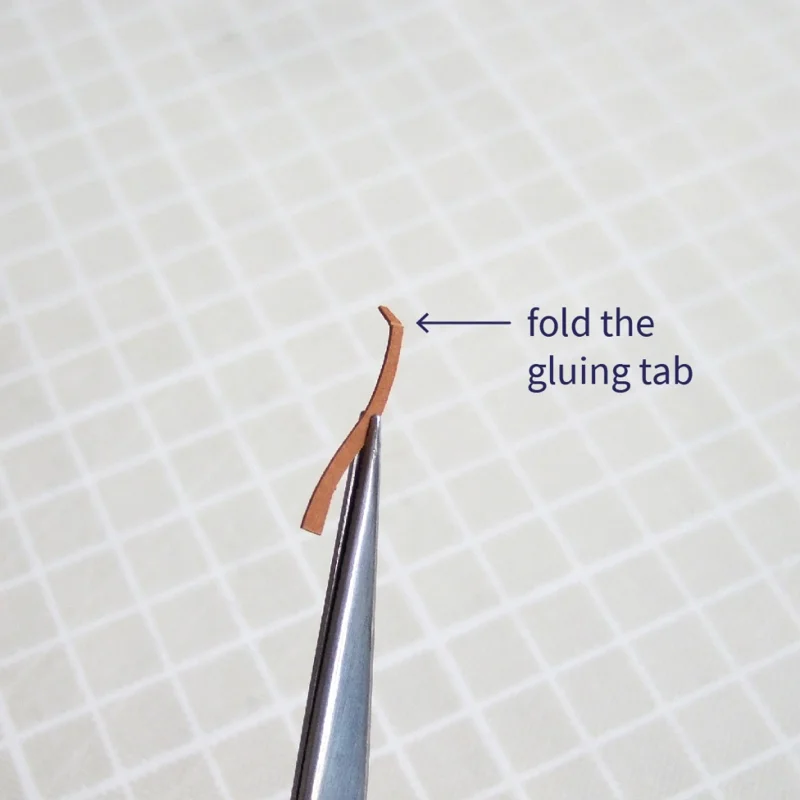
Fold over and glue long straight arm supports, then fold the small gluing tab on the top end. Apply glue to both ends, locate bottom of the support, then attach gluing tab under the arm bow. Repeat other side and fiddle adjust position to ensure same both sides.
写真上4枚)残った小さな4つの部品のうち、まっすぐで長い支柱2つを半分に折って接着して強度を与え、トップののりしろを後ろに倒すように折ります。上下に接着剤を置き、まず座面枠後方の穴に差し込んでから前方に倒すようにしてアーム部の下にトップを貼ります。繰り返し、アーム部を下にして、のりしろの位置が左右対称になって表から隠れるよう乾く前に調整します。


Fold the small gluing tab on the top end of the curved middle support. Apply glue to the both ends, locate bottom of the support, then attach gluing tab under the arm bow. Repeat other side and adjust position to ensure same both sides. Check no gluing tabs are sticking out and disturbing the arm bow lines.
写真上3枚)残ったカーブのある部材2つの上端をラインで折り曲げ、手前から見たときに上に向かってふくらむ形状で左右対称に接着します。これも穴に先に接着し、手前に倒すようにしてアーム下部に当て、椅子ぜんたいの上下をひっくりかえして、のりしろの位置が左右対称で表から隠れるよう乾く前に調整します。


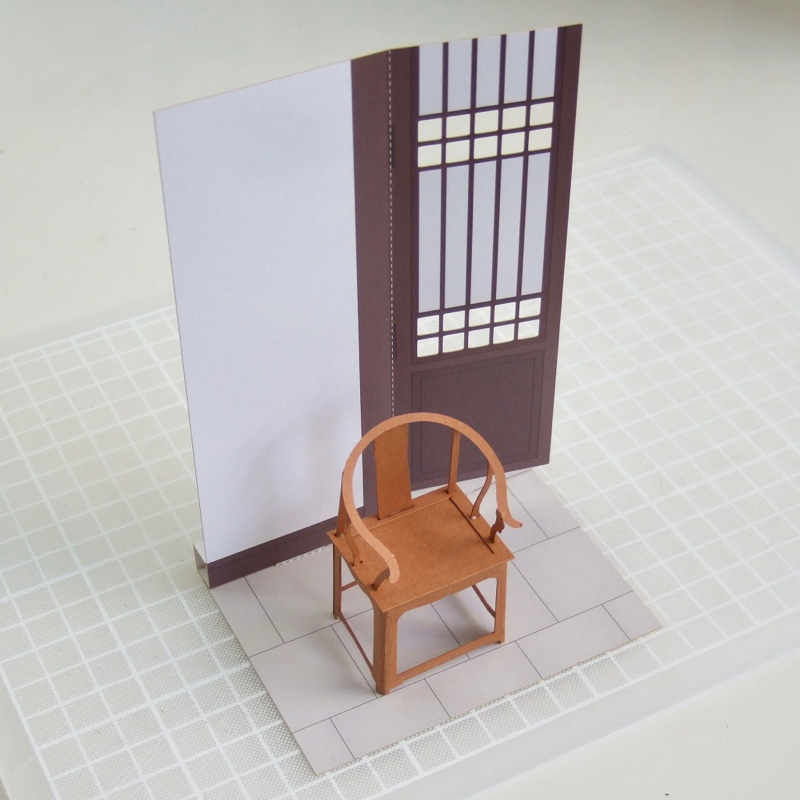
When the side view shows close to the image below, the chair is complete. Assemble the wall and floor, referring to How to assemble background, and the diorama is complete.
写真上3枚)横から見た時に写真のような感じになったら、椅子の完成です。背景を組み立て、ジオラマを完成させます。