How to assemble 003 Butterfly chair
バタフライチェアの組み立て方

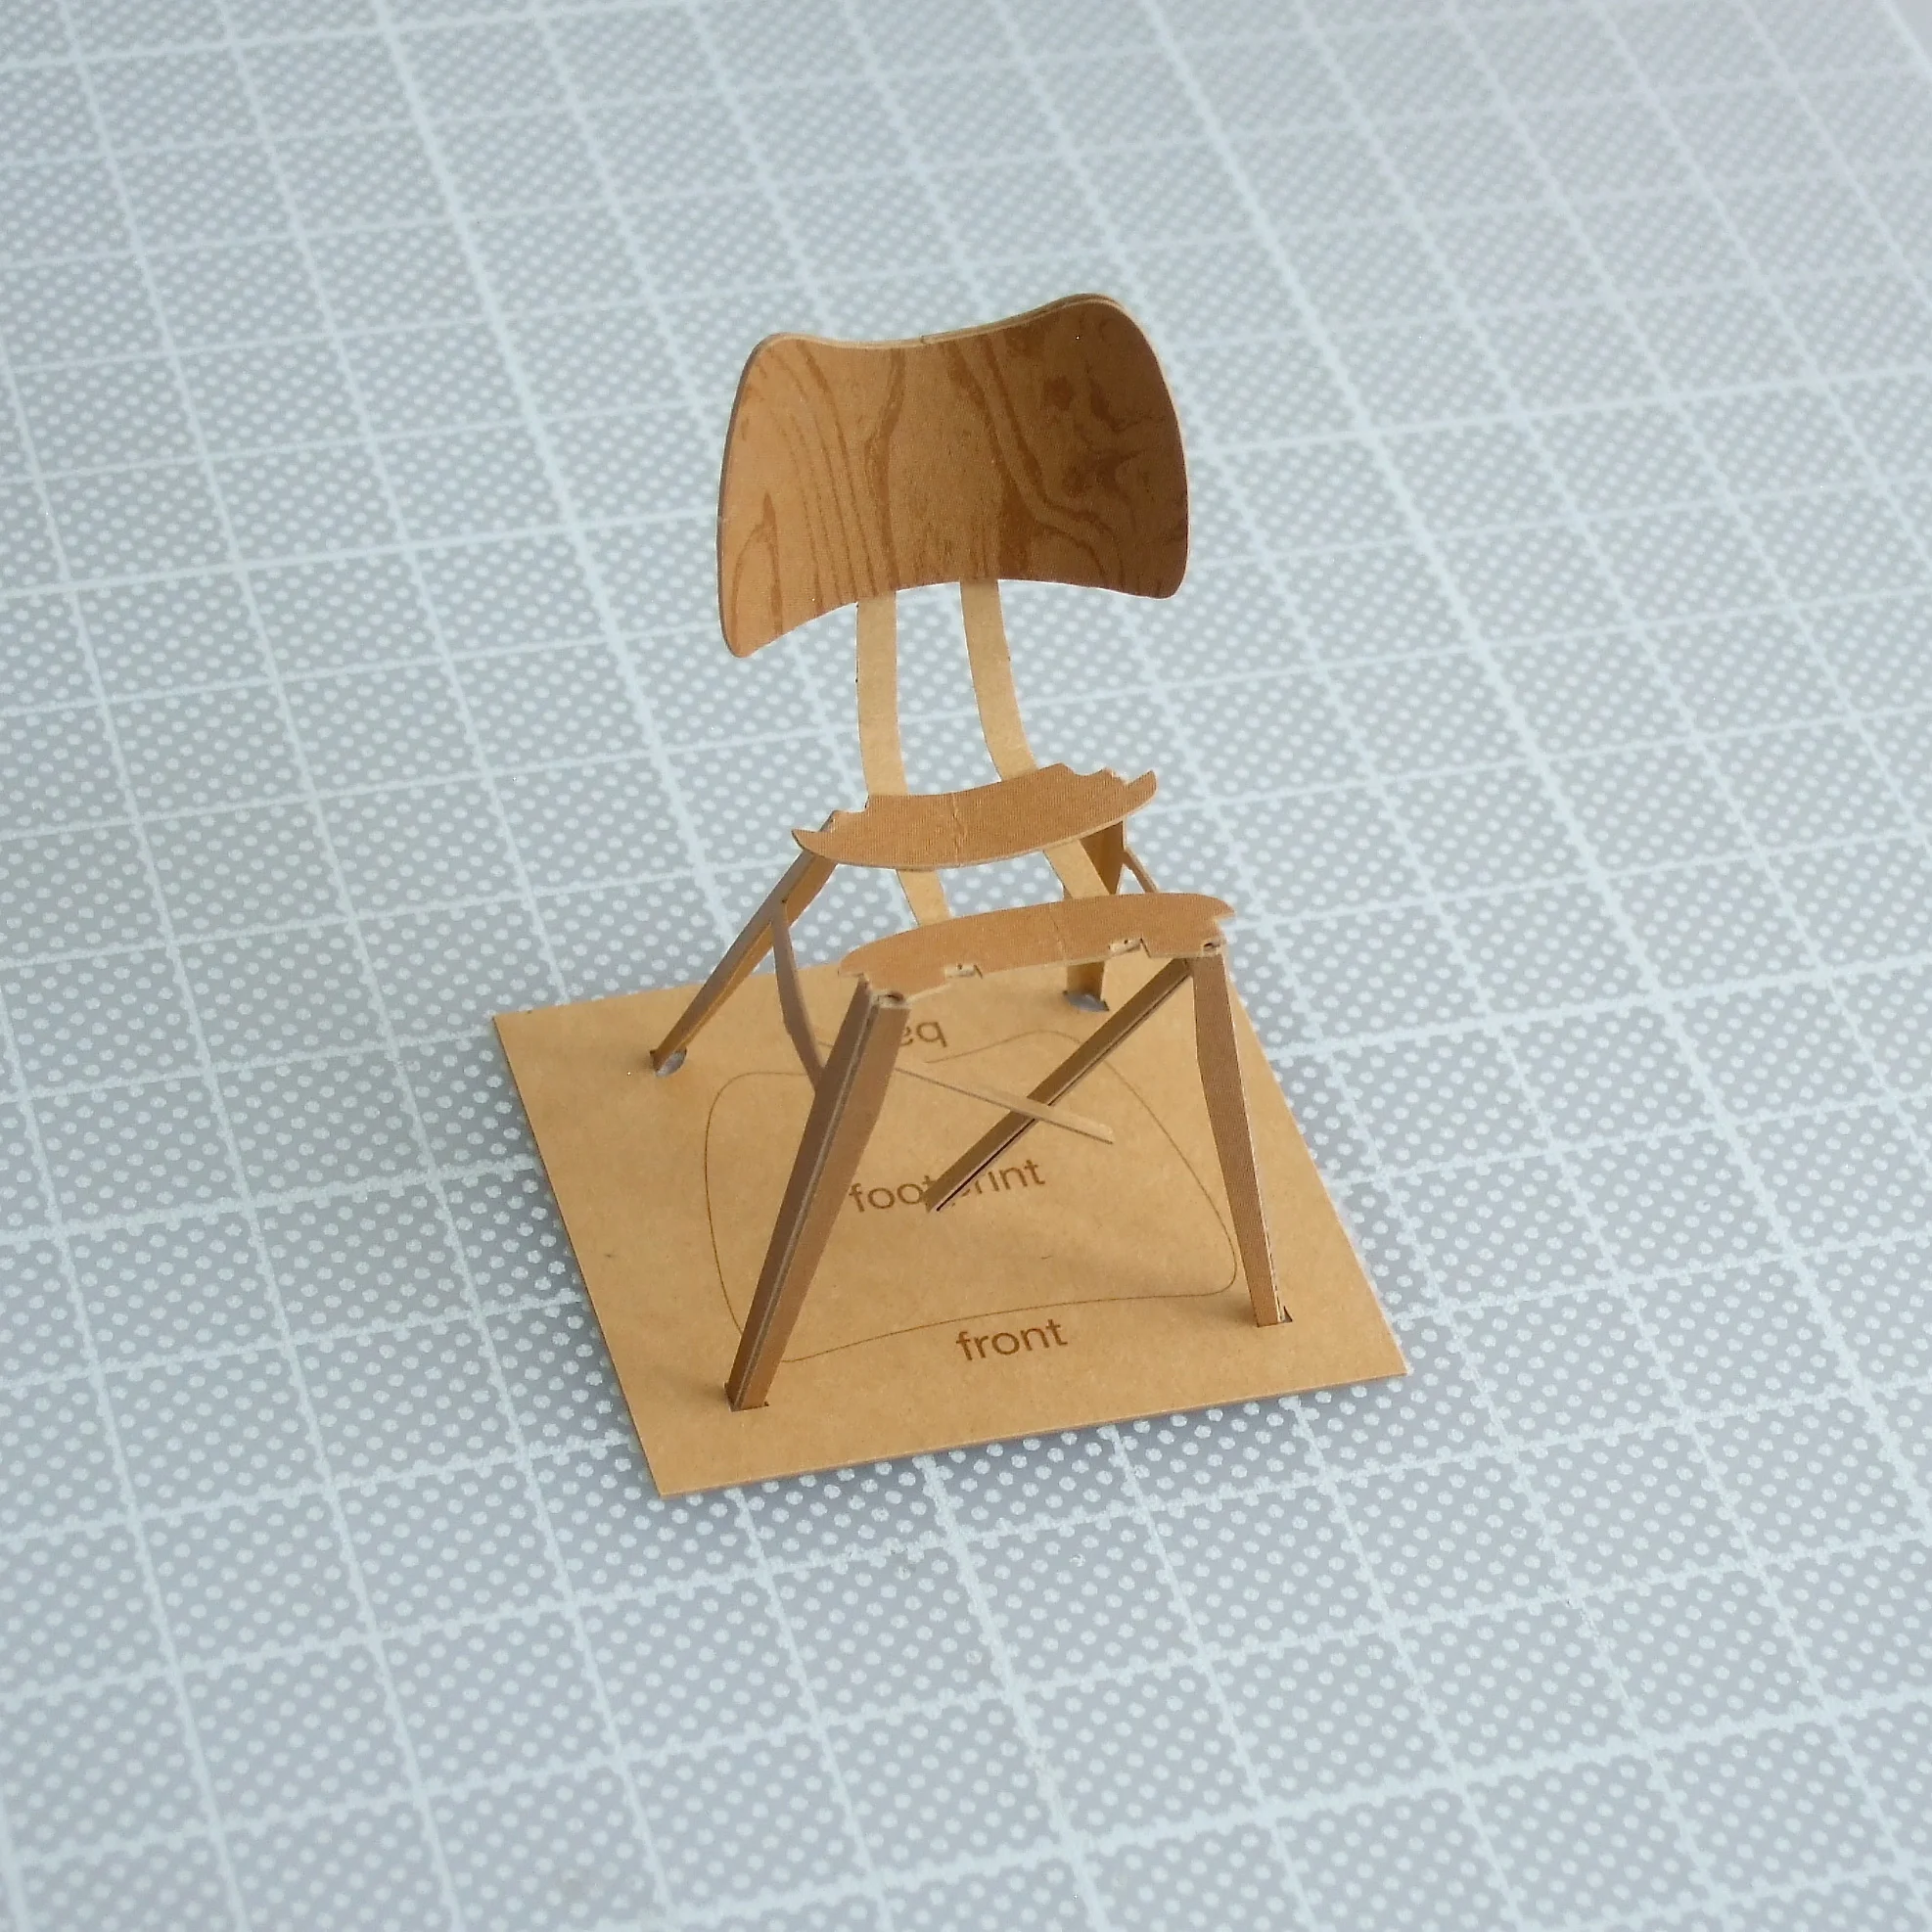
This is the 003 Butterfly chair set after completion. Here’s how to build it…
バラフライチェアが組み上がったところです。組み立て方を順を追って説明します。

There are three cards in the package, together with assembly instructions. Detach all parts of the chair from the second card, using a craft knife/scalpel – connections are indicated by little triangles.
この3枚のカードと組み立て説明書が1セットです。まず、レーザー加工されている厚紙から、小さな三角形で示している「つなぎ箇所」をカッターなどで切り落とし、パーツを外します。

Before starting, we recommend that you use a pointy stick ( such as a cocktail stick ) for applying glue during the process of assembly. This helps to make the complete model clean and neat.
作り始める前に。今からの手順で接着をする時には、つまようじなどの先の細いもので小さな面積に接着剤を塗るときれいに仕上がります。

After all parts are detached from the card, cut out the footprint location template and holes as a set ( as above ), to be used later.
パーツを切り離したあと、左下にあるフットプリントを長方形に切り離すと、後でのりづけする時に使いやすくなりす。
Form curves for seat and backrest, as shown in the picture below. It is best to use a sharp solid corner, press and roll each piece with the ball of your thumb.
背と座の部分にカーブを付けます。一枚ずつ、親指の腹で机の角などに押しあて、前後に転がすようにして丸みを付けます。


Apply glue on one side of seat ( larger parts ), then press two layers together. Before the glue is dry, insert it into the hole named ‘seat curve’ and set the shape.
座(大きい方の2枚)の片側に接着剤をつけ、2枚を重ねて乾かないうちに台紙の穴「seat curve」に通し、カーブを定着させます。


Apply glue on one side of backrest, then press two layers together. Before the glue is dry, insert it into the hole named ‘backrest curve’ and set the shape.
同じように、背の片側に接着剤をつけ、2枚を重ねて乾かないうちに台紙の穴「backrest curve」に通し、カーブを定着させます。


Whilst you assemble the other parts, it is best to leave them in the template to dry.
他の部分を組み立てている間は、カーブを固定したまま乾かすと良いでしょう。

Legs next! Fold along the engraved lines and shape into four legs. Place the edge of a ruler behind the engraved line – this helps to make the fold easier and more precise.
次に脚を組み立てます。脚を4本、レーザーのラインを折って椅子の形に近づけます。定規の角などを折り線のうしろに添えて押すと、ラインがきれいに出ます。


Fold four small ‘tongues’ at the end of each leg, too. Then fold two legs together at small dots, side by side.
脚の上部にある小さな「舌」も折り曲げます。左右の脚を2脚ずつ同時に、小さな穴の空いている箇所で折り曲げます。


Turn the part upside down, press and roll the center seat supports to give a curve similar to the seat.
座を支える中心の部分を、角のあるものに当てて指で押して座のカーブと同じような丸みをつけます。


Now, attach the backrest to the two uprights. Fold down the two supports of backrest under the connecting parts, apply glue to the hatched area, glue them all together and shape the curve at the bottom of backrest support, as shown on the following picture.
背を土台の部分に貼ります。2本の支柱を連結部の下方向に向けて折り、斜線部分にのりづけし、背を貼付けて支柱の下の部分にカーブを付けて下の写真のようにします。

Fold brace under rung at a hole, fold again in the middle where another hole is. Then glue the two together.
横桟の下に突き出した「貫」の部分を小さな穴の部分で2度折り曲げ、重ねて糊づけします。

Turn the footprint card up side down, place sticky tape to make holes tacky, then place the four legs in the holes.
脚のロケーション穴がある紙の裏から粘着テープを貼り、その上に椅子を置いて脚を穴に入れ固定します。


Apply glue to two braces sticking out from each side, press under the seat and adjust the rung and legs on a flat plane.
左右から出ている貫の部分を重ねてのりづけし、横桟と脚が曲がらないで同じ平面になるよう調整します。
Apply a drop of glue under each of the legs where the tongues are sticking out – then place the chair back on the footprint card, to dry it in shape.
椅子を裏返し、脚部の「舌」が飛び出ている場所に接着剤を少し多めに盛り、フットプリントのカードに貼りもどして乾燥させます。


Apply glue on the hatched area on the seat, then fix to the connecting support – adjust a bit to make gluing location and angle of the legs correct.
斜線の部分に接着剤をつけ、座との連結部に重ねて貼りつけます。フットプリントの台紙に戻し、接着剤が乾く前に形を整えましょう。


When the glue is dry, take the footprint card off, and the Butterfly chair is complete! This is one of the most difficult ones to construct, so well done to you!!!
のりづけ箇所が乾いたら、台紙のカードから外してバタフライチェアの出来上がりです。このモデルが一番難しいのですが、、組み上がりましたか?

The last step is to assemble the wall and floor. Please refer How to assemble background, to complete.
次は壁と床を組み立て、完成です。詳細は背景の組み立て方を参考にしてください。
