How to assemble Sussex armchair
サセックス・アームチェアの組み立て方

This is the 001 Sussex armchair set after completion. Here’s how to build it…
写真はサセックス・アームチェアを組み立てたところです。このキットの組み立て方を順を追って説明します。

There are three cards in the package, together with assembly instructions. Detach all parts of the chair from the second card, using a craft knife/scalpel – connections are indicated by little triangles.
この3枚のカードと組み立て説明書が1セットです。まず、レーザー加工されている厚紙から、小さな三角形で示している「つなぎ箇所」をカッターなどで切り落とし、パーツを外します。


Fold along engraved lines and shape into a chair. Place the edge of a ruler behind the engraved line – this helps to make the fold easier and more precise.
Fold two ends of separate small part which fits under the seat, at the little holes, as below.
レーザーのラインを折って椅子の形に近づけます。定規の角などを折り線のうしろに添えて押すと、ラインがきれいに出ます。後で座面の下に入る別のピースは、小さな丸い穴のところで両端を折ります。


First, assemble the backrest – apply glue to the hatched area, with a pointy stick (such as a cocktail stick), fold the back part at the arrowed line. Press the top of the back with your fingers and give it a curve, as shown below. Glue the back legs hatched areas, press firmly to fix.
まず背もたれを作ります。斜線の部分につまようじの先など細いもので接着剤をつけ、矢印の場所で後ろ部分全体を折り曲げ、下の写真のように指で押して背もたれの上部を湾曲させながら接着します。続けて、うしろ脚ののりしろを内側に重ねて接着します。


Give some curve to the top bars of armrests by pressing with fingers. Then insert the separate part which supports the arms, from underneath the seat and up through the rectangular opening, then glue each side to the inside of the armrests, at hatched area.
次に肘あてになる部分を少し曲げてカーブをつけます。座面の下から端を折った別パーツを長方形の穴に通し、斜線部分に接着剤を塗って2枚を重ねて貼ります。


When the both side of support of arms are firmly glues and dried, approach from inside and glue folded part to the hatched area.
肘あて下の重なった部分が乾いたら、座面下の内側から斜線部分に接着剤を付け、折り曲げた部分を重ねて接着します。

Then glue the front legs. The Sussex chair is complete!
最後に前足を斜線ののりしろで貼りあわせると、椅子の完成です。


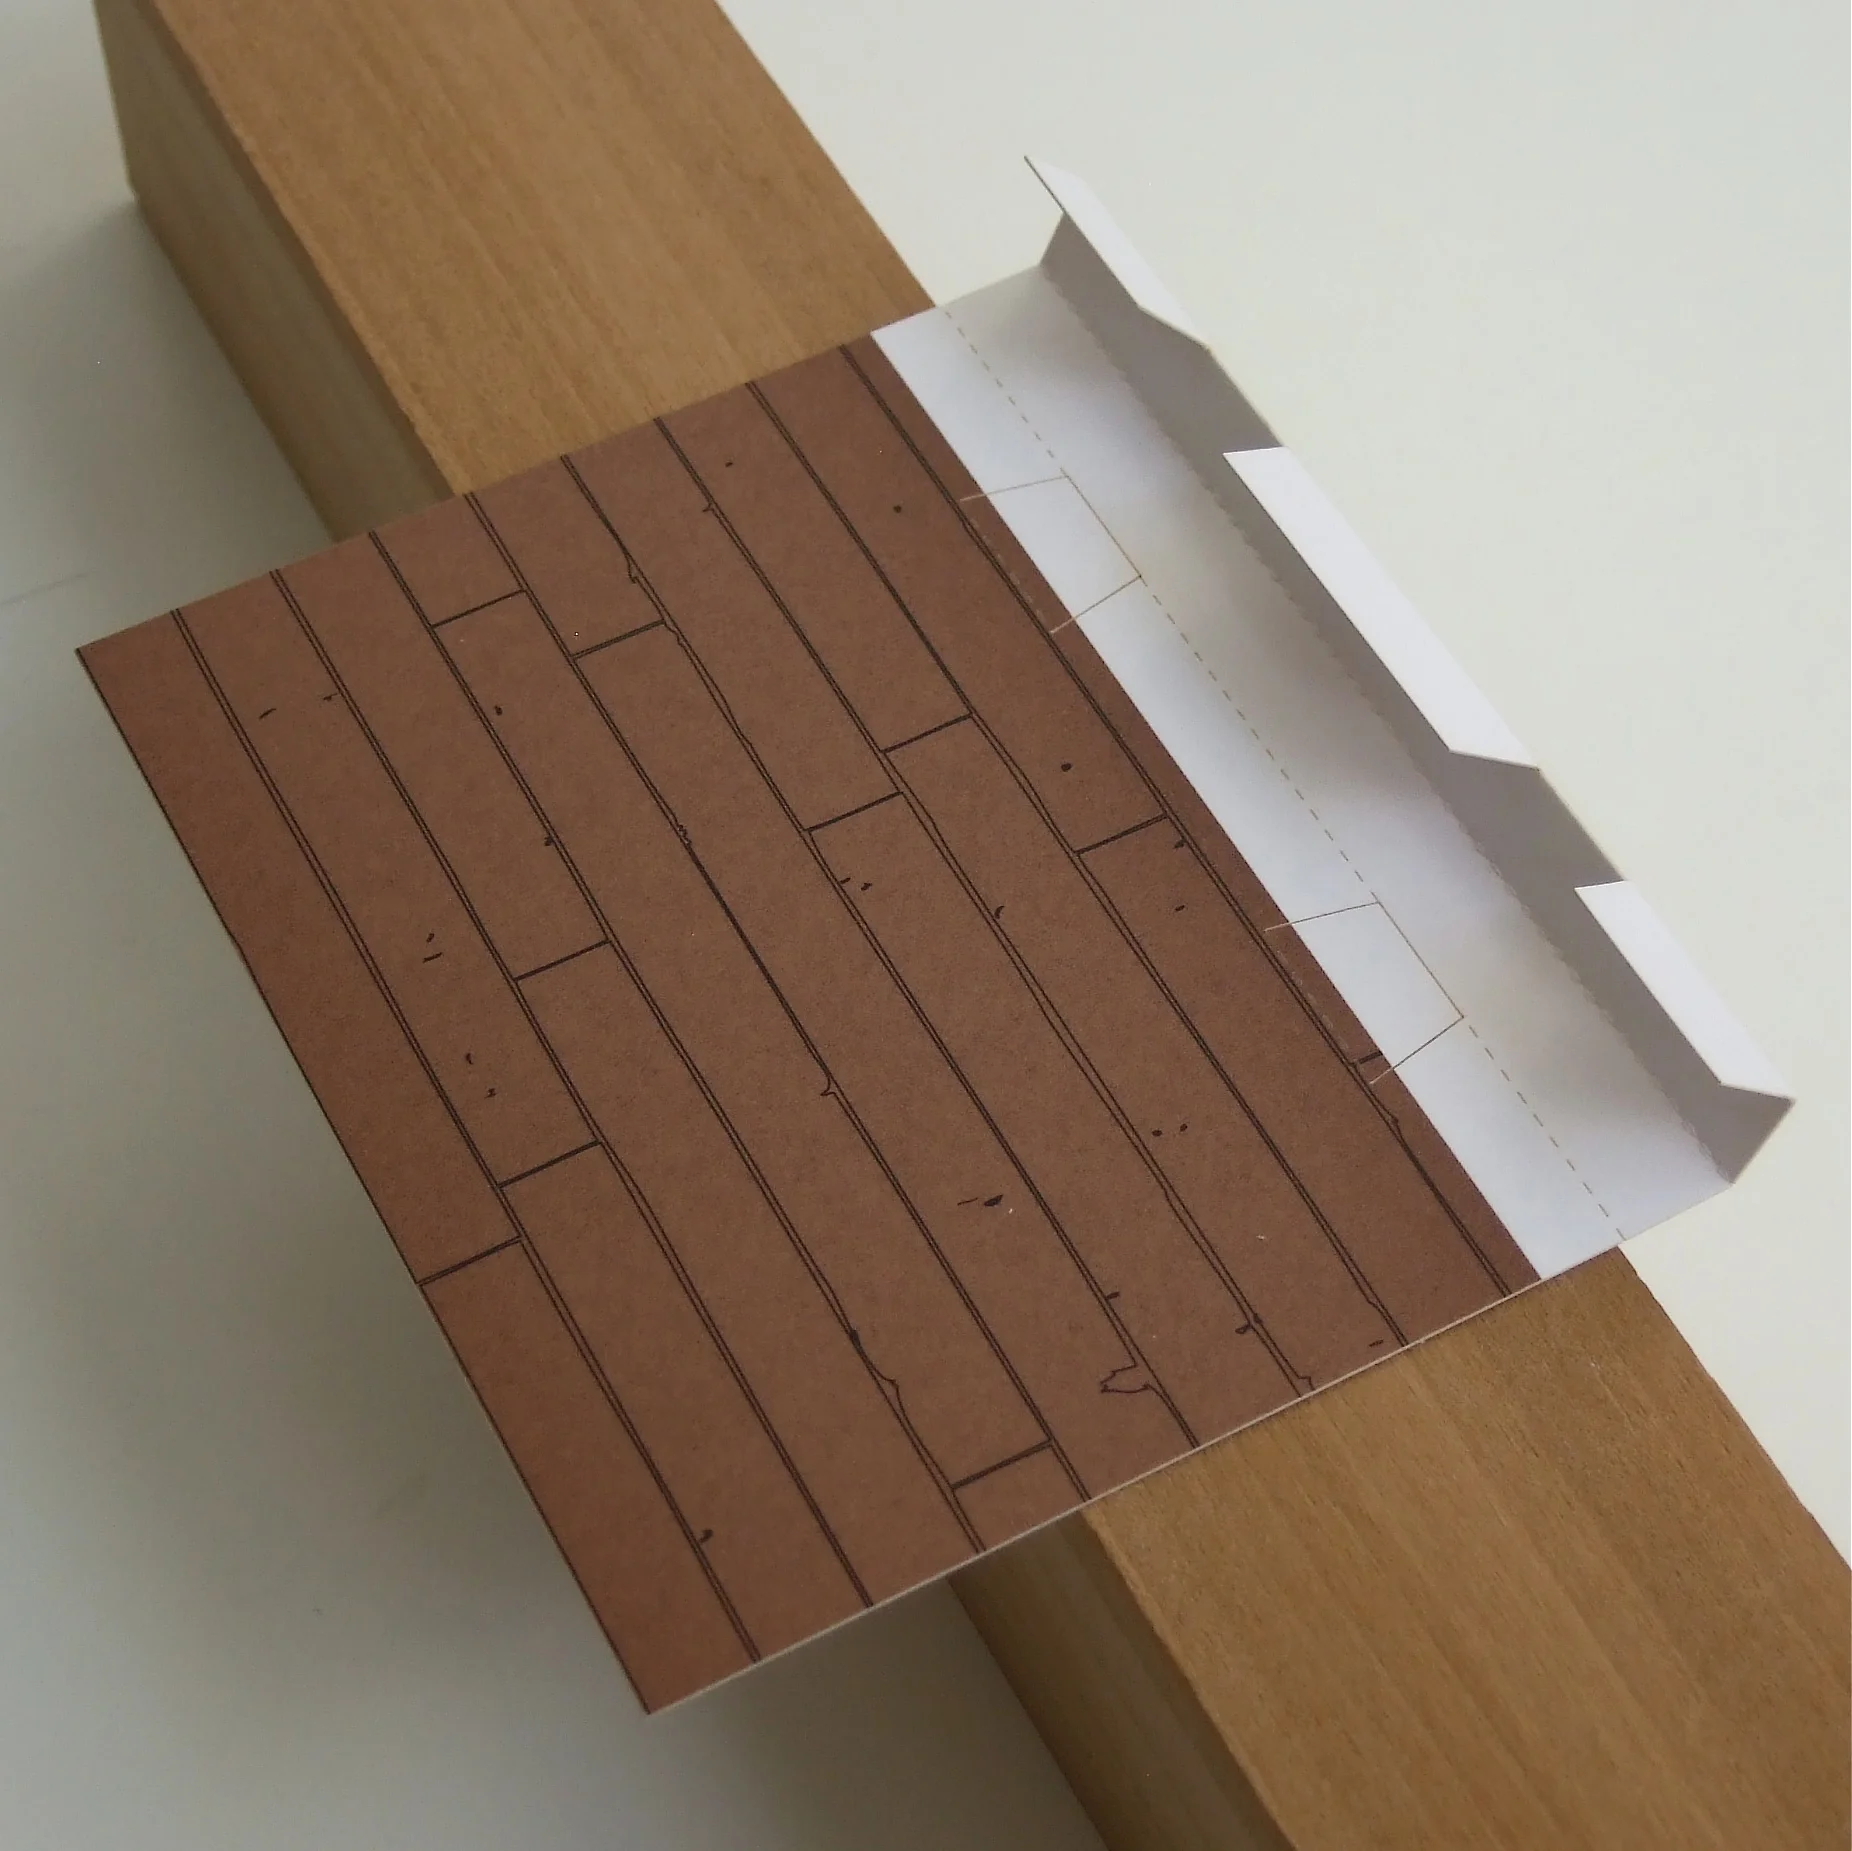
Next is the wall and floor – it is best to use the corner of an object such as a table edge or piece of wood, and a ruler, to fold lines cleanly.
次は壁と床です。エッジの立った角材などと定規を組み合わせて使うと、折り線がきれいに仕上がります。

With the printed side of the WALL facing upwards, fold the bottom of the wall DOWN once, as in photo above.
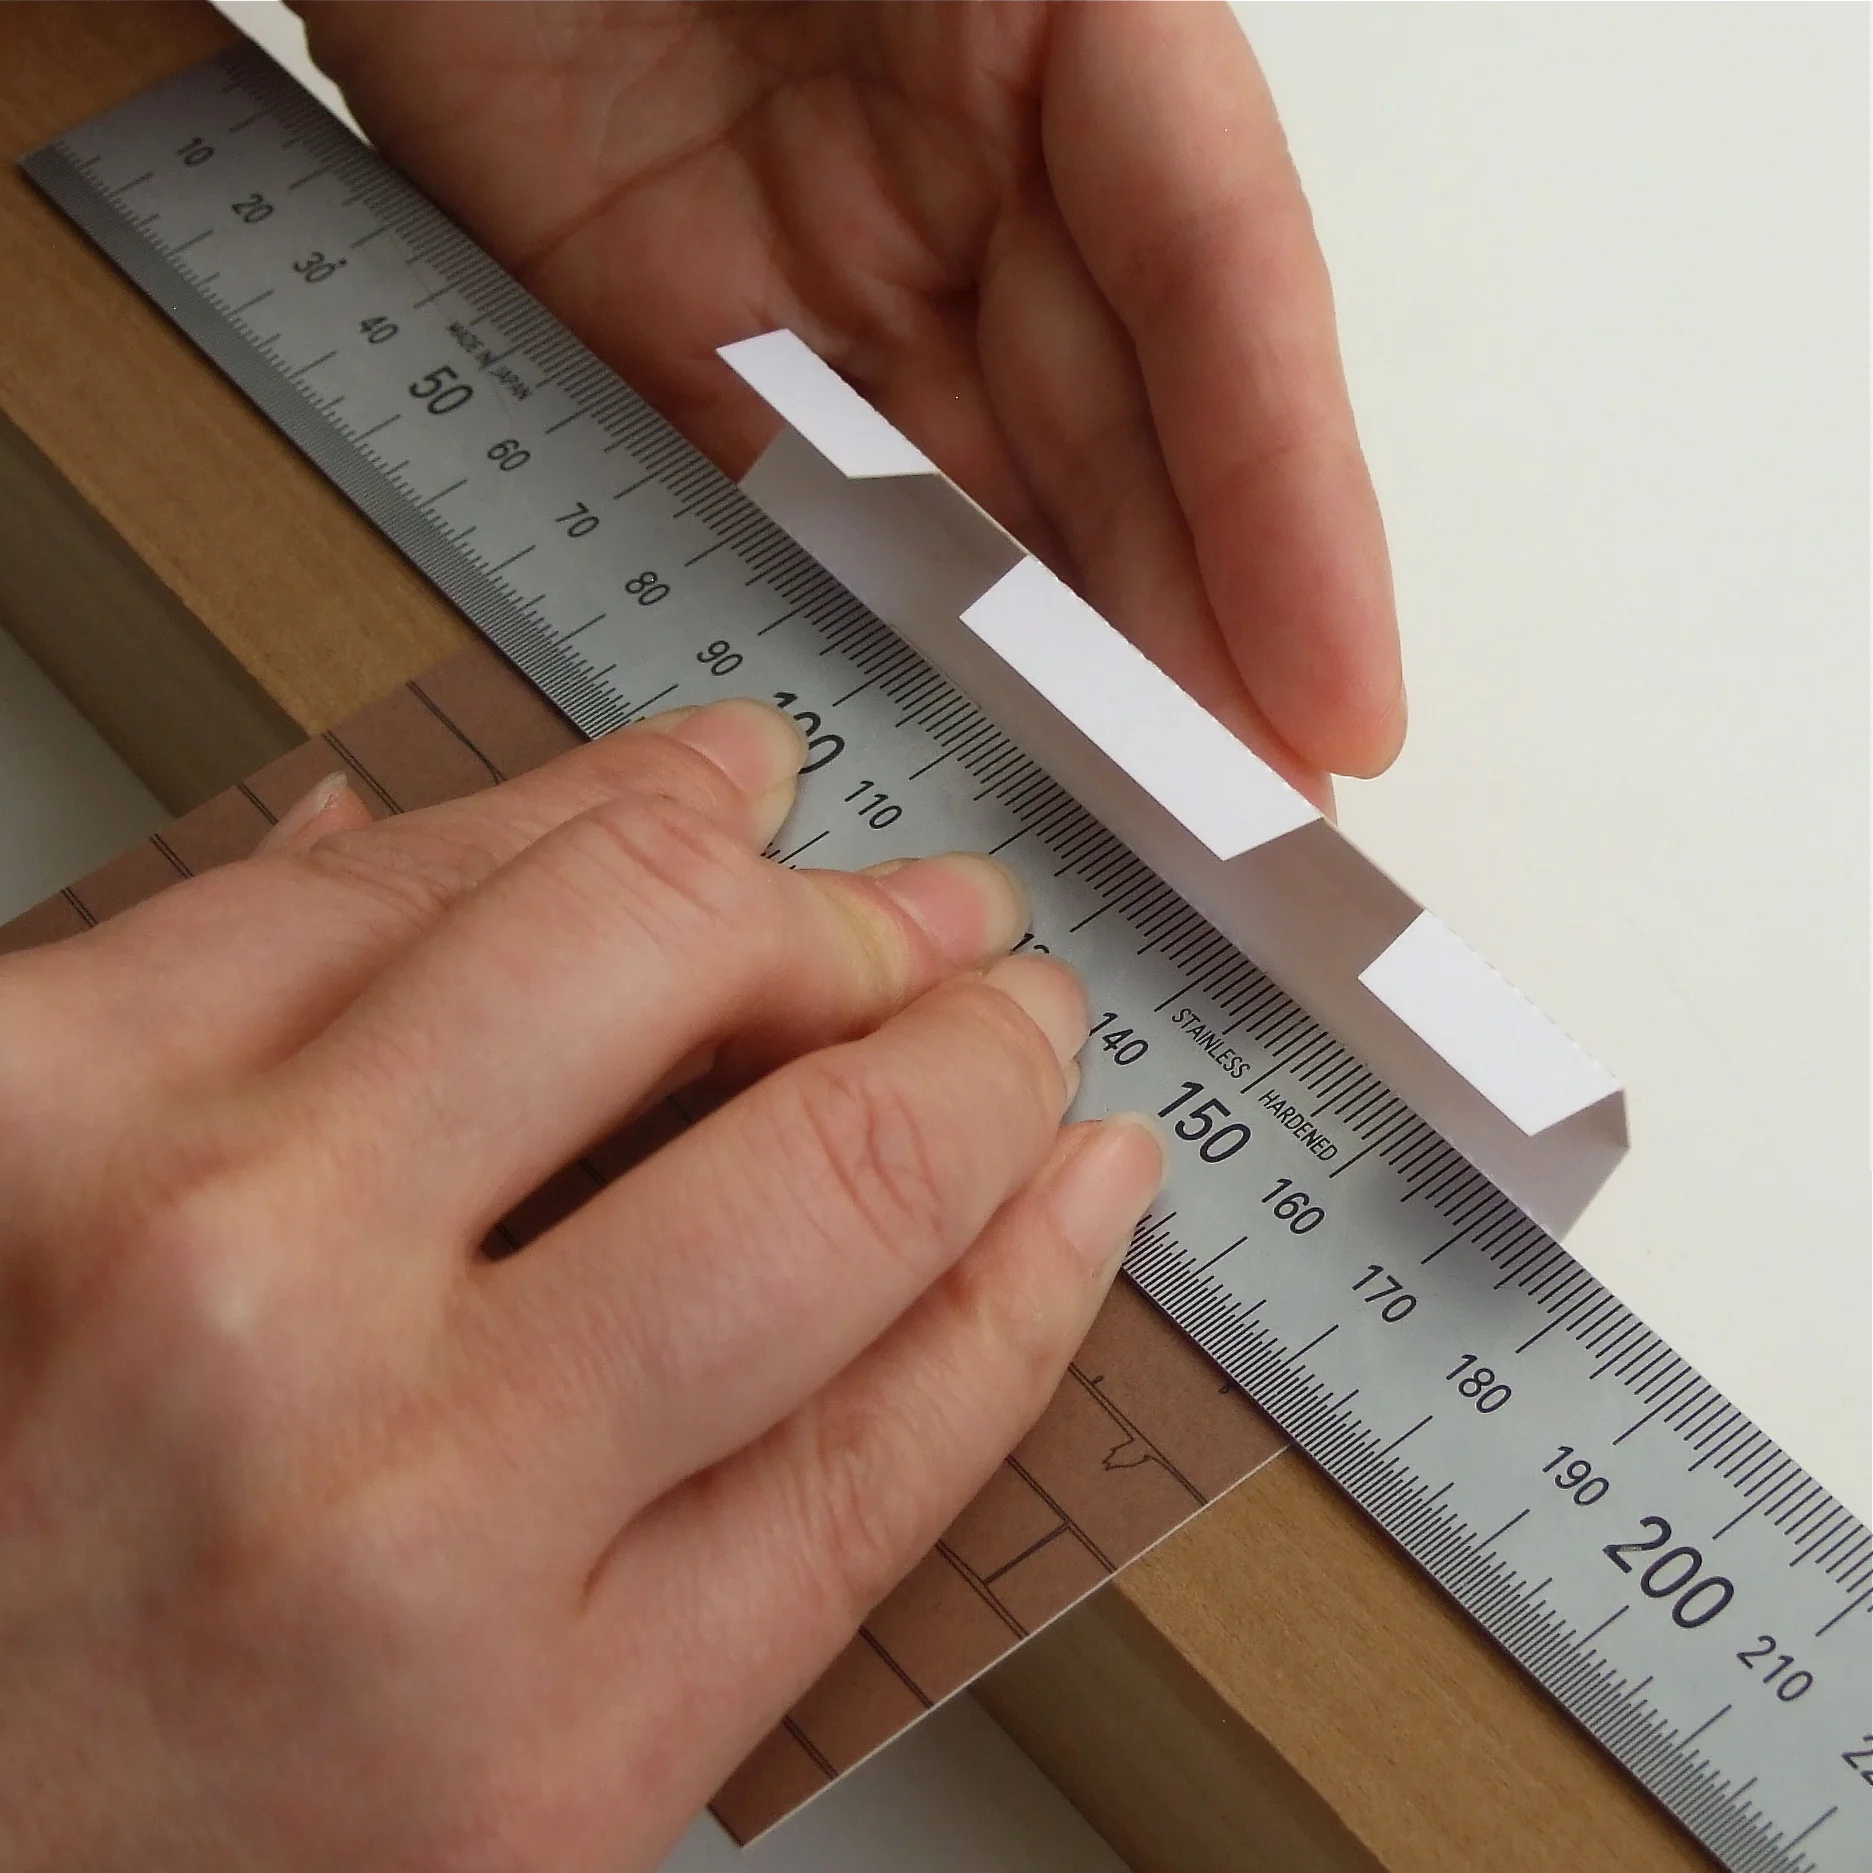
With the printed side of the FLOOR facing upwards – fold UP along all three dotted lines. Fold up two small tabs as well. Then turn the wall part back-side facing upwards and glue the three ‘tongues’ of the floor at the arrowed folding line ( last photo ) so that the floor is now attached to the wall.
壁と床のカードを印刷面を上にして置き、壁の下部は山折り(うしろへ)、床の後ろになる部分は3回、谷折り(手前に)します。後でさし込みになる「舌」も2カ所、手前に折り上げます。壁を裏返し、裏に見える折り線(矢印の場所)に合わせて、床部分の3つののりしろを貼り合わせます。


Apply glue to the hatched area, and place the floor part on the back of wall part, at the line shown with arrows. Press firmly and wait until the glue is dry.
床パーツの斜線の部分に接着剤をのせ、壁パーツの裏側の矢印の線にあわせて貼りあわせます。接着が乾くまで少し待ちましょう。


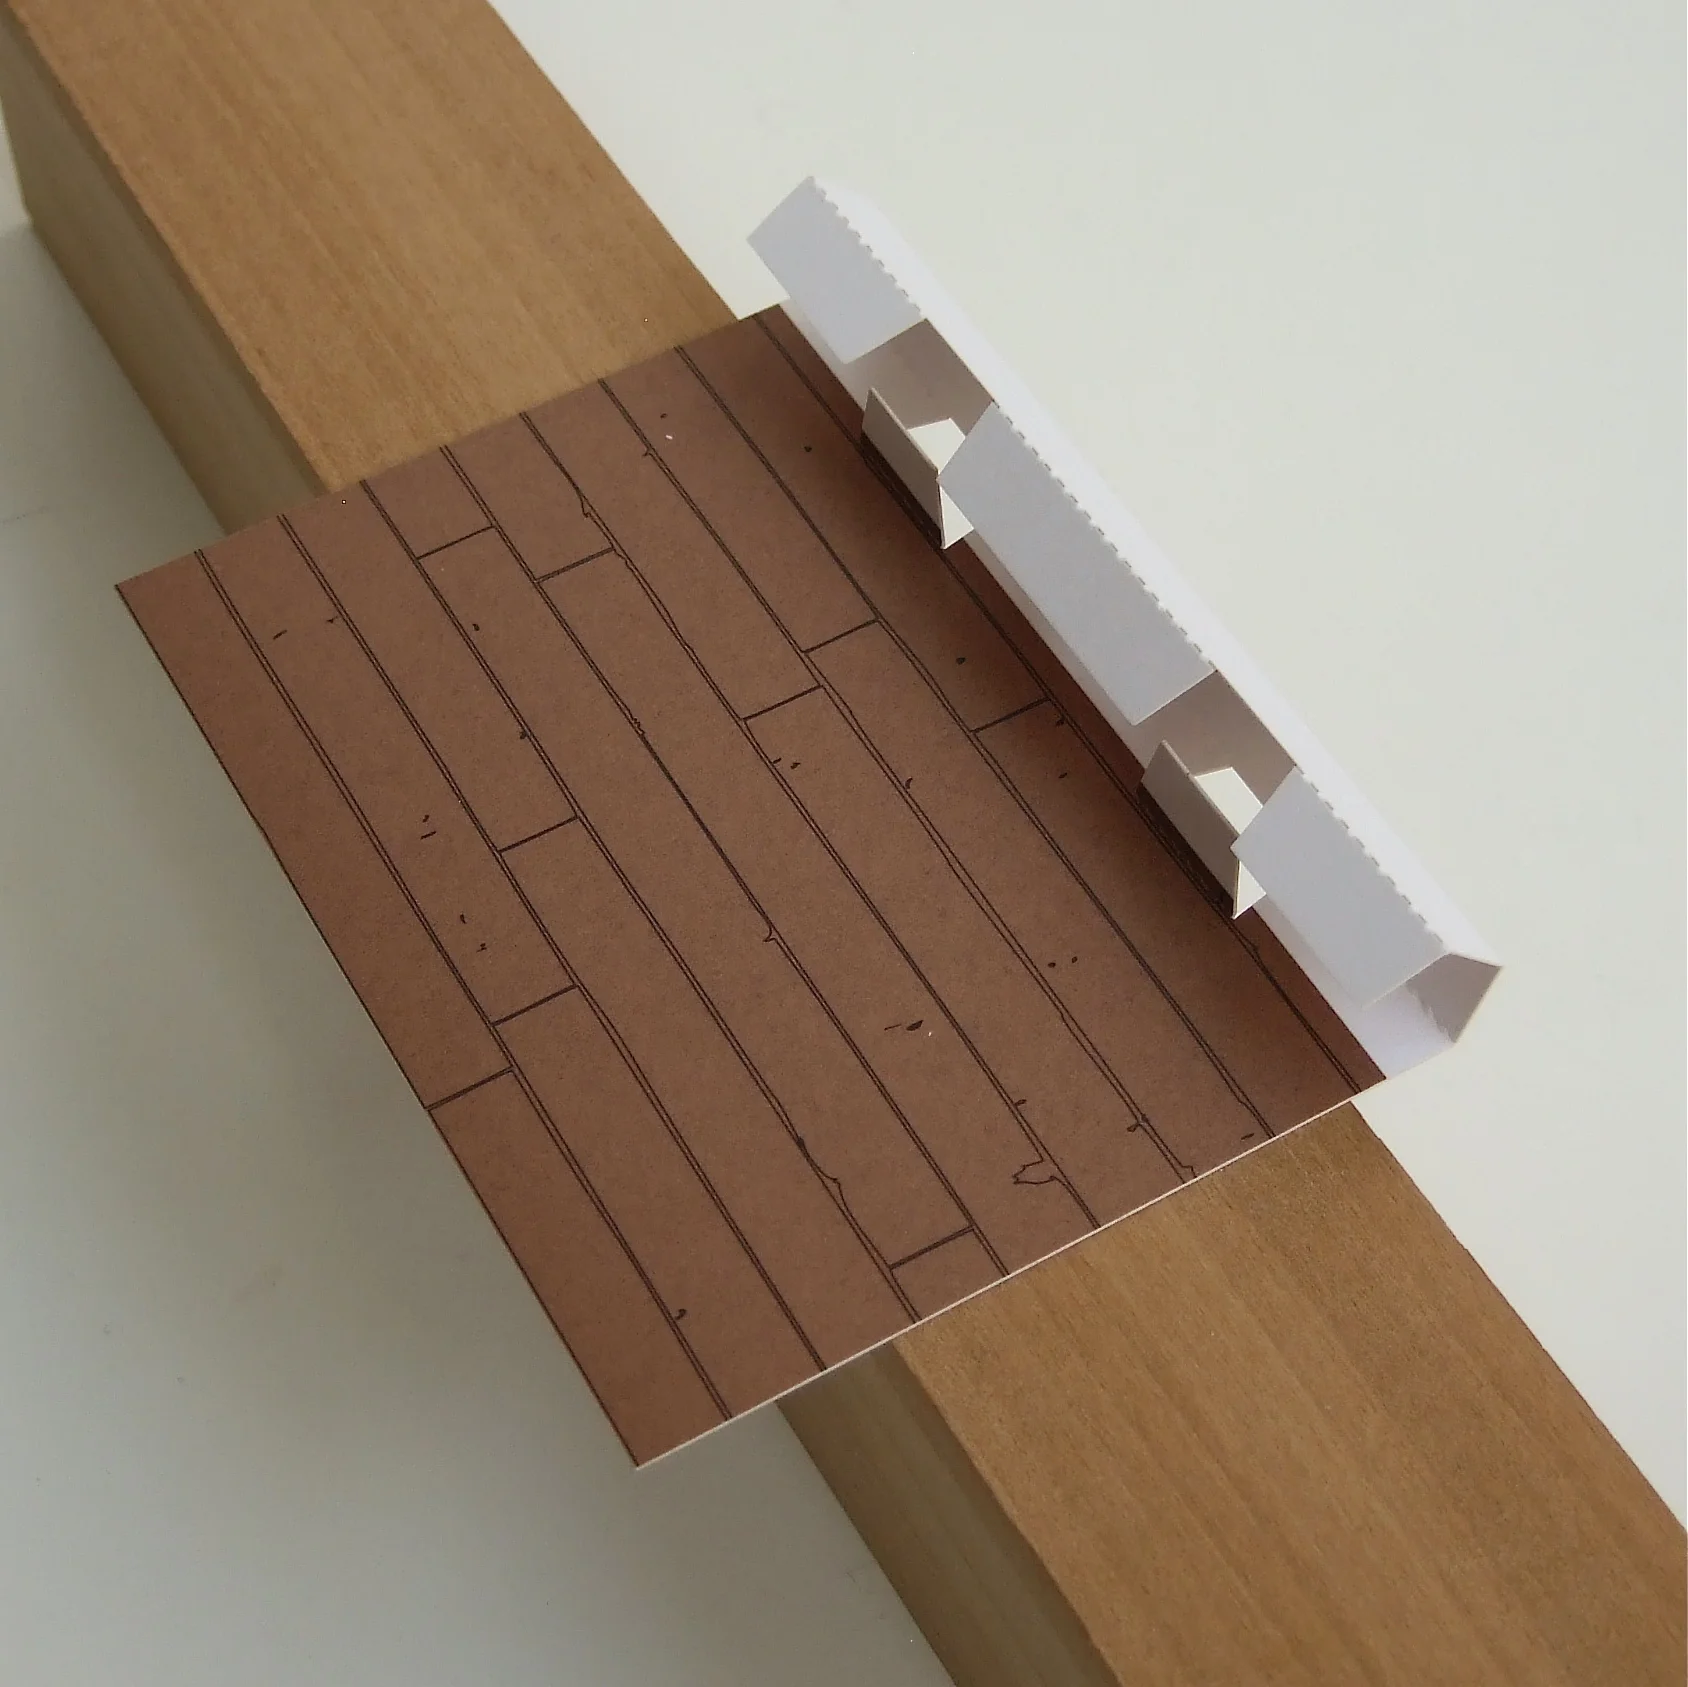
Turn the floor part around then insert the two tabs into the slots below the front of the wall – it is best to insert both at the same time. Adjust the back to make the wall and floor at right-angles to each other. If you want, you can glue at the indicated points for a permanent display, or leave without glue should you wish to flat-pack the interior in the future.
床パーツを手前に折りこみ、ツノ状の2つを壁パーツの下にある切れ込みにさしこむと完成です。斜線部分に接着剤をつけ固定することもできますし、もしも背景をフラットに戻して収納する場合は、のりづけなしでも立ちます。壁と床をぴったり合わせ、後ろに出来た小さな正方形で調整して直角にします。

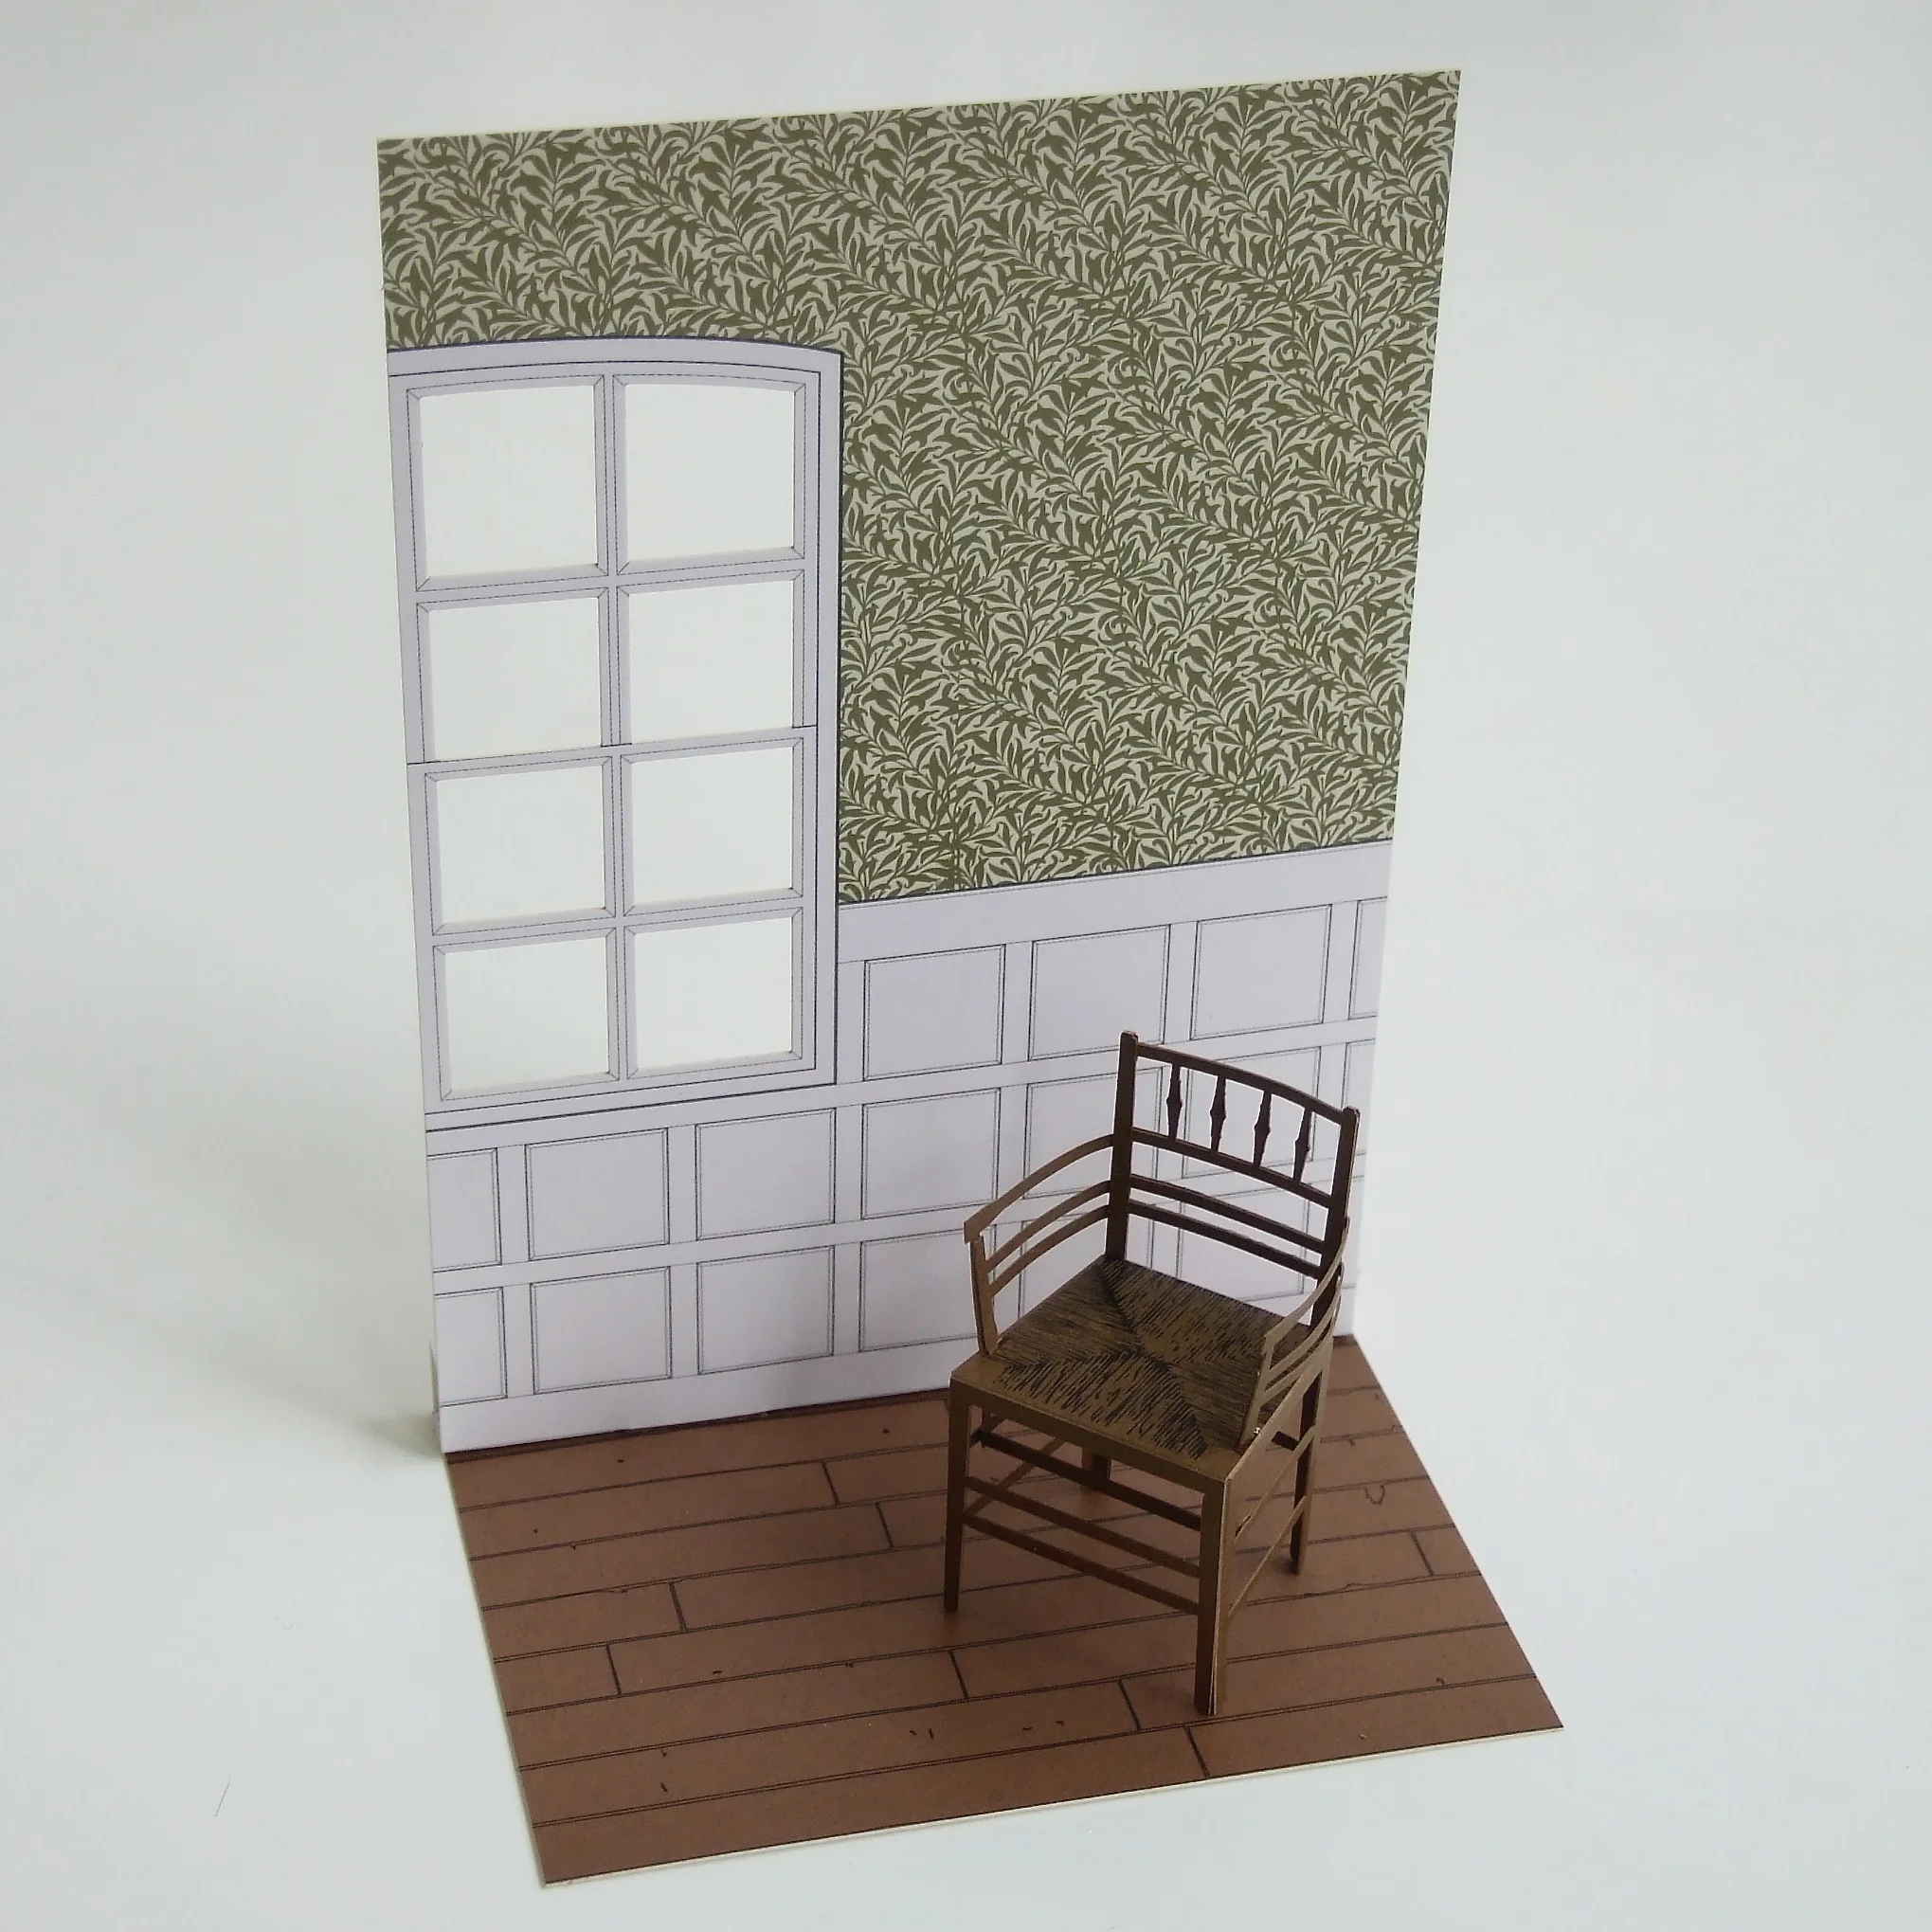
When you place the chair in the scene, the diorama is complete!
椅子を置いてジオラマの完成です。